
Hello, in my recent tutorials you have learned to tighten blog security and to enable a gzip compression using a .htaccess file on your server. Today in this tutorial I am sharing ways to access and edit .htaccess file on your server.
First, let me tell you why do we use the .htaccess file on the server. We use the .htaccess file to configure the server. Most of the bloggers use shared or managed hosting where you have to contact host provider whenever you need any modification on the server. So this is a bit time-consuming process.
So to overcome this, there is a file named .htaccess. You have to put this file in the WordPress directory to make changes for the particular website. You are allowed to use multiple .htaccess files to manage your websites.For example, use different .htaccess files for your sub-directories.
Ways to access .htaccess file
Following are the three typical ways to access your .htaccess file so that you can edit it.
- cPanel’s File Manager
- An FTP client such as Filezilla
- Yoast SEO plugin (note! use only for small, safe edits)
One mistake and your site will disappear
Any single mistake in .htaccess file result in the web server return a blank page or error 500. So some precaution should be taken while updating .htaccess file.

Always make a backup copy of the current .htaccess file.
You can save the backup on your desktop so that if anything goes wrong, it will be easy to restore the backup file.
After a successful edit, do check your website in the different browser. Clear browser cookies and cache, this reduces the risk of picking up a cached page.
Don’t use Yoast SEO for having significant changes in .htaccess because if you broke up with your site, you can’t restore the backup using Yoast SEO plugin.
Edit .htaccess File Using cPanel File Manager
Editing .htaccess file using cPanel file manager is the recommend method as it offers powerful direct editing of the .htaccess file, and is accessible whether the file contains an error or not.
To edit .htaccess file using cPanel file manager follow the steps:
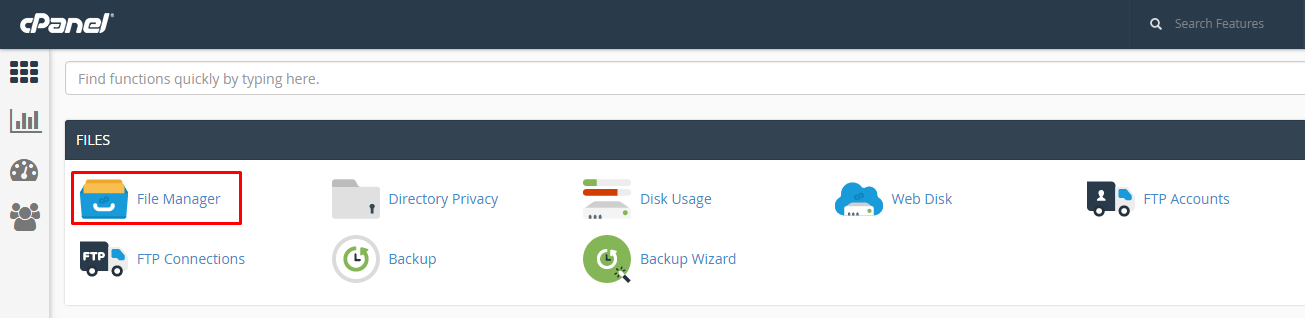
- Log into the cPanel
- Scroll down and click File Manager

- Check the option to show the hidden files in File Manager
- In File manager find public_html
- Navigate to the root folder of the website whose .htaccess file you want to edit.
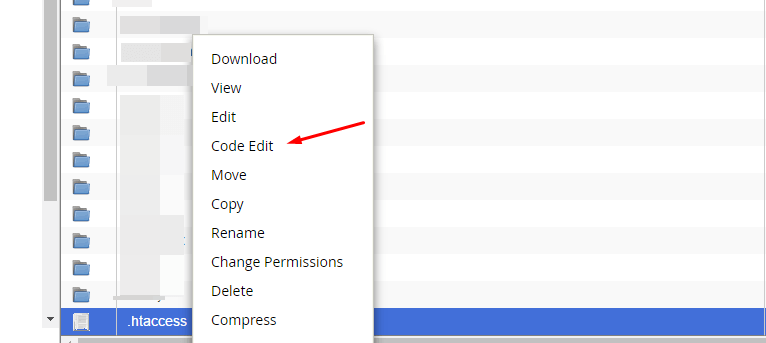
- Select .htaccess file, right click and choose Code Edit. You can select Download option to make a backup file on your desktop.

- Make your edits and save changes from top right corner.
- Don’t forget to check your site after edits.
Edit .htaccess File Using FTP Client
To use this method, you can use FileZilla as FTP Client. By using FTP Client, you can make a backup file of your current .htaccess file on your desktop. It is also a safe way to edit .htaccess file.
To edit .htaccess file using FTP, all you have to follow steps:
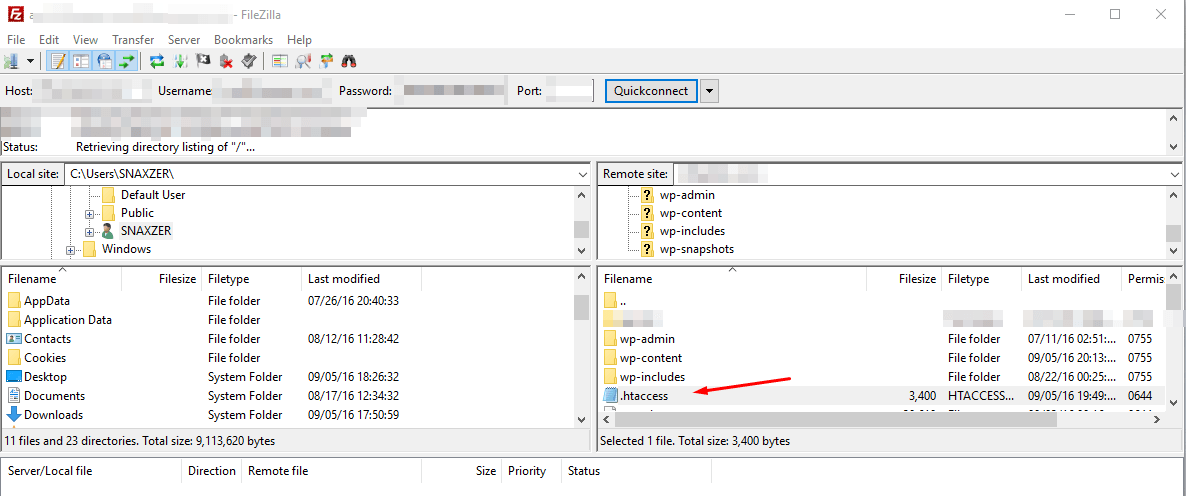
- Connect your website using FTP Client (FileZilla).
- Navigate to the root directory of your site.
- Drag and drop .htaccess file from FileZilla to the desktop.
- Edit .htaccess file using an editor like, Notepad or Notepad ++.
- After editing, upload it to the directory.
Don’t forget to check your website working after updating .htaccess file. If your site shows a blank page, you can upload the backup file to fix it.
Edit .htaccess file using Yoast SEO Plugin
Don’t use this method to make major modification in the .htaccess file. Because if anything goes wrong site will disappear and you will not able to fix it using the plugin. Instead, you can use cPanel or FTP to fix it.
To edit .htaccess file follow the steps bellow:
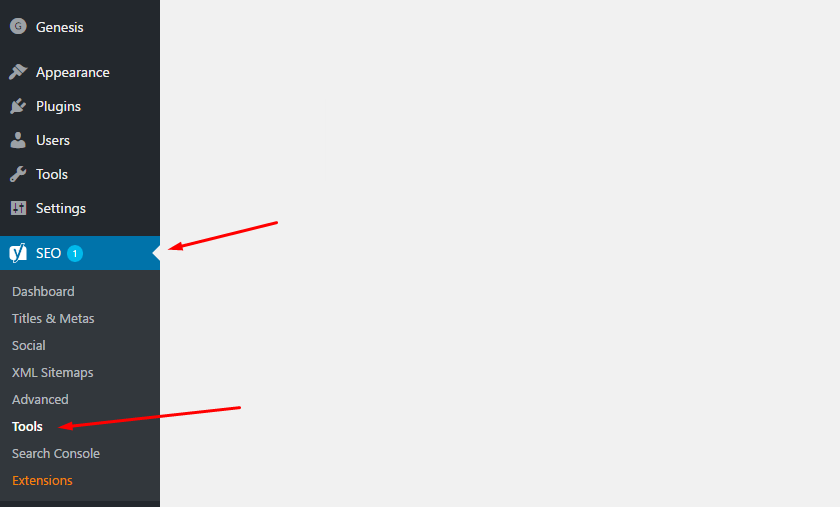
- Log in to the WordPress dashboard
- Navigate to SEO option on the left navigation

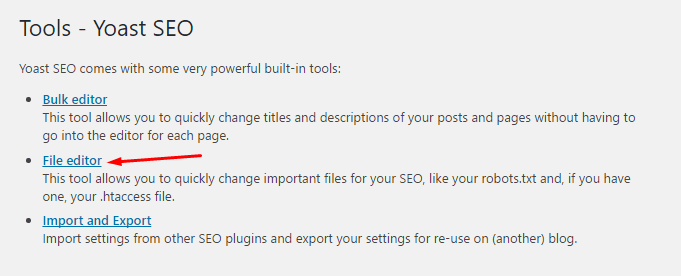
- Choose File editor

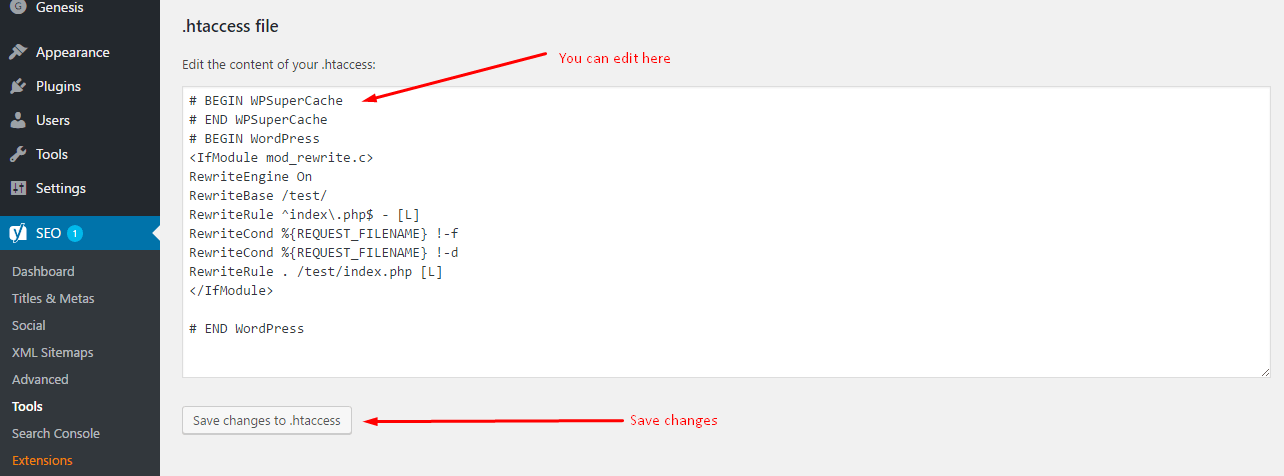
- Edit .htaccess and Save changes

Conclusion
So, these are the best three ways to edit .htaccess file on your web server. I repeat, don’t forget to make a backup of current .htaccess file before you make any changes in it.