
Website SEO plays an important role to get more traffic on the site. SEO stands for the Search Engine Optimization. SEO helps you to index your website in the various search engines. There are lots of popular SEO plugins are available in the WordPress plugin directory. Among the list, Yoast SEO is the best option for the newbie.
Yoast SEO is WordPress plugin by the team Joost de Valk. It has 1+ Million Active Installs. Basically, it’s a very good idea to have this plugin installed on your site.
In this tutorial, I am gonna tell you installing and configuring guide for the Yoast WordPress SEO Plugin.
So let’s start with the installation process.
Installing Yoast SEO
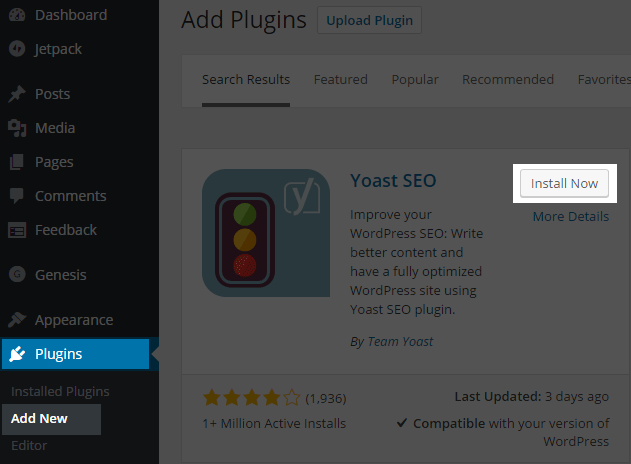
- Login to WordPress Admin area of your blog.
- Go to plugins from the left-hand side navigation.
- Add new and search for “Yoast SEO” in the search bar on the right-hand side of the screen.
- Click on Install Now
Configuring the plugin
Once you install and active the plugin you can see the new tab named SEO in the left-hand side navigation at the admin panel. It has 7 subpages for the configuration. Don’t panic, it’s easy to configure. Let’s start configuring the plugin step by step.

General – Yoast SEO
Go to SEO tab >> General >> Dashboard
- In dashboard section, you can see the notifications for problems and improvements to your website.
Features
In this section, you can manage all the features available in Yoast SEO plugin. You can enable or disable any feature just with a click.
Webmaster Tools
Now, this is a bit complicated to set up. To get meta values from the services like Google, Bing, Yandex, you have to submit your website to search engines. You can click blue links as shown in the image below to submit your site.
READ| How To Add Your New Site To Google Webmaster Tools
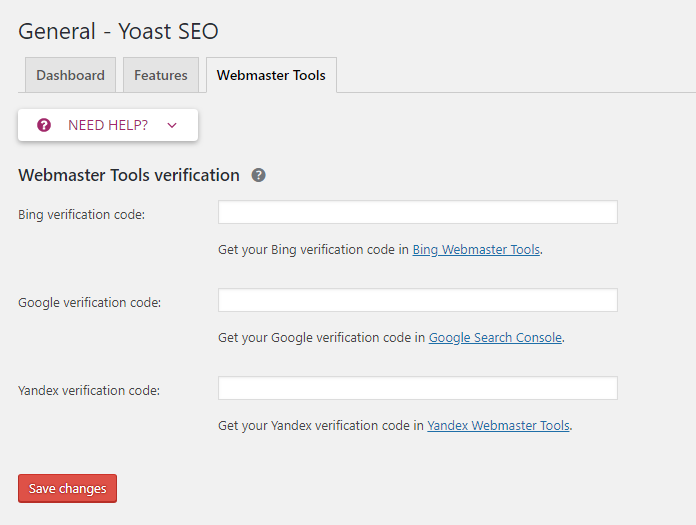
After getting all the meta codes from webmaster place them to the respected input fields and hit Save changes button.
Search Appearance
General
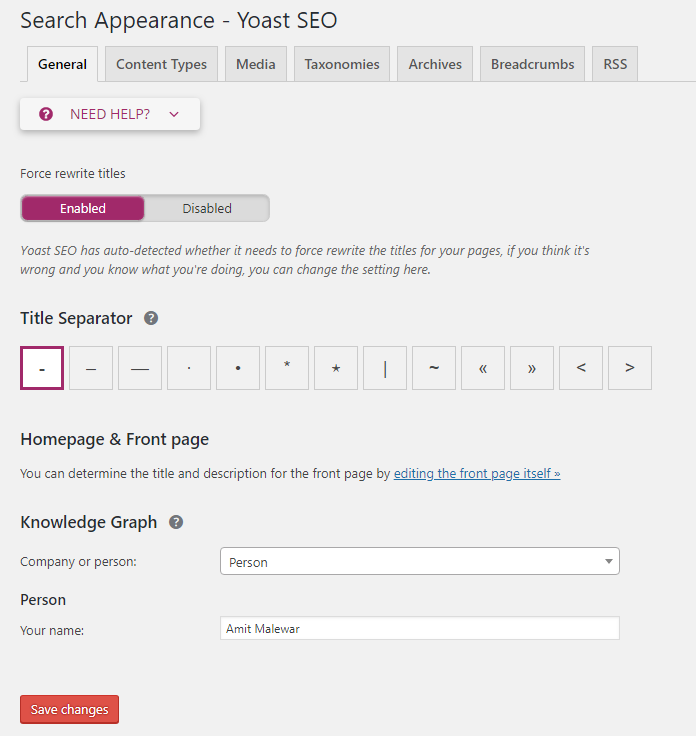
- Enable force rewrite title.
- Title separator, choose as shown in the image below.
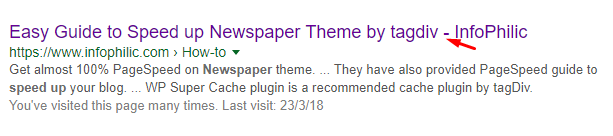
It is the title separator you see in your post title on SERP.
Title separator shown in SERP Snippet - Homepage & Front page settings are not available as I am using a static page as my homepage. If you are not using static page then you will this option enable.

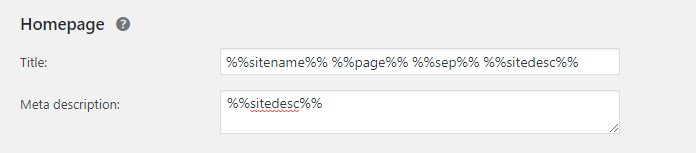
Home page search appearance setting Yoast SEO plugin Here, you need to put
%%sitename%% %%page%% %%sep%% %%sitedesc%%in the title field and%%sitedesc%%in Meta description field.
Read a detailed guide on how to Get Featured Snippets on Google.
Content Types
Posts & Pages
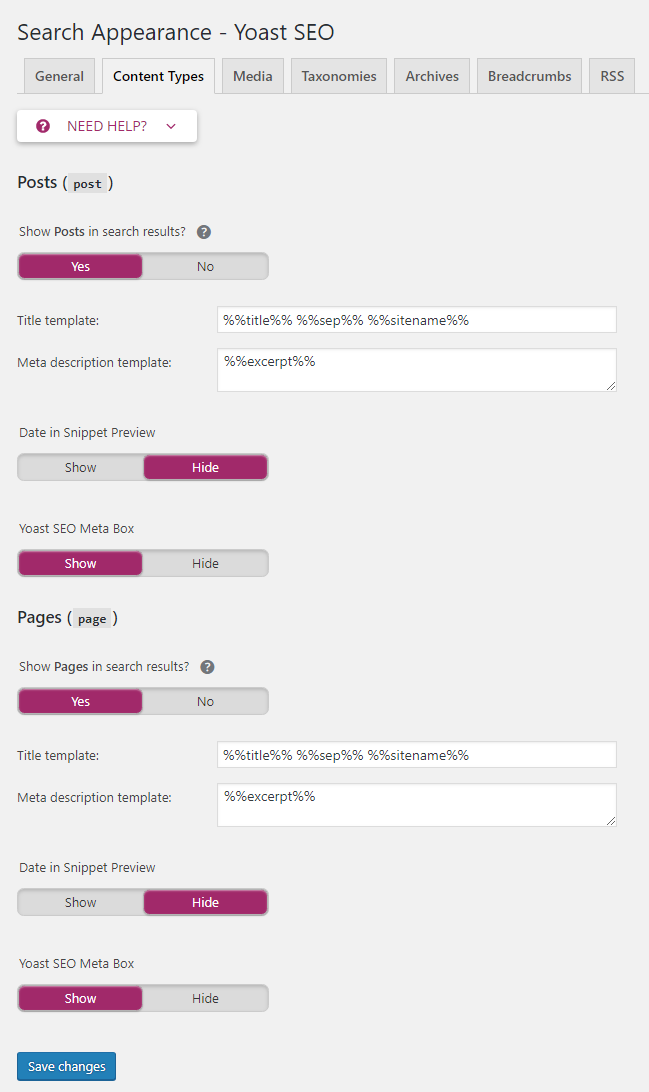
- Enable – show posts ( in search results.
- Input
%%title%% %%sep%% %%sitename%%in title template - Input
%%excerpt%%in title template - Date in Snippet preview, here I have hidden date in SERP, you want to show date in SERP then enable it.
- Show Yoast SEO meta box.
Media

It is advised to turn on redirect attachment URLs to attachment itself. So if you enable it, you don’t need to do anything to this section.
Taxonomies
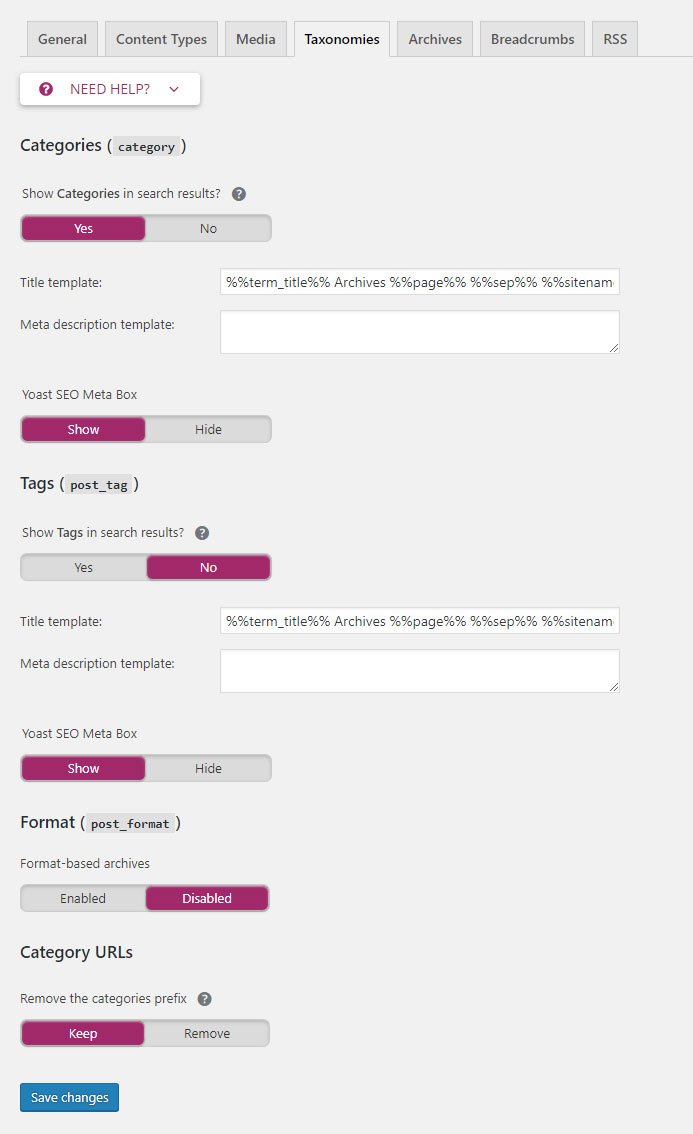
- Input
%%term_title%% Archives %%page%% %%sep%% %%sitename%%in title template. - Meta description template – left it blank or you may input –
%%excerpt%% - Categories in search results – Yes
- Yoast SEO meta box (for categories) – Show
- Tags in search results – No
- Show Yoast SEO meta box (for tags) – Show
- Format based archive – Disabled
- Category URLs – Keep
Archives
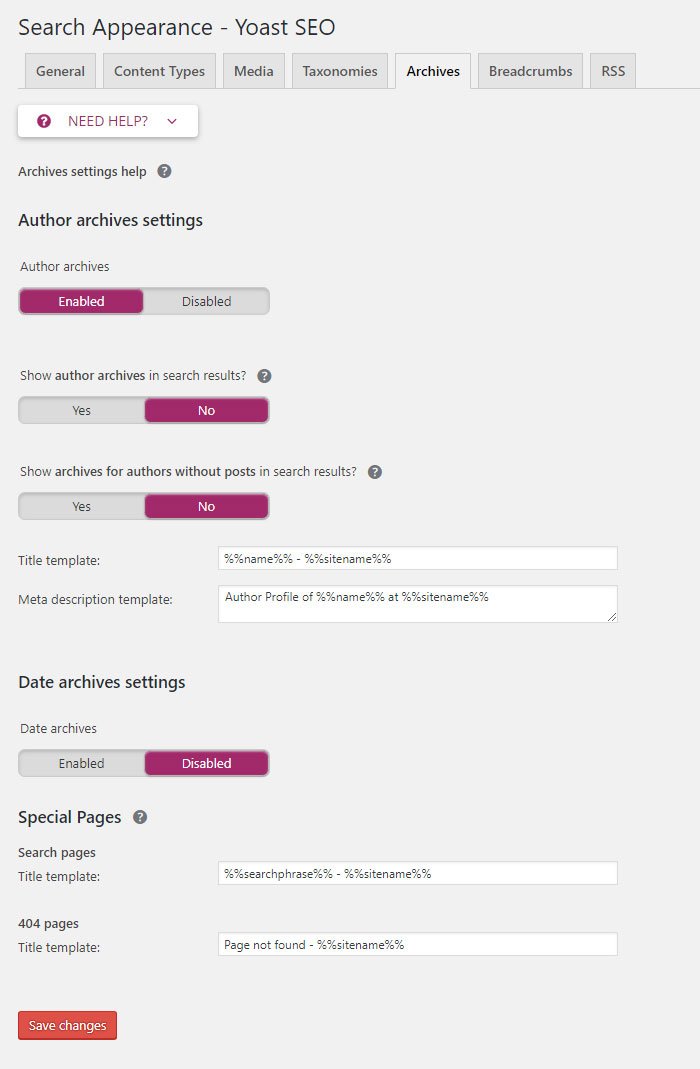
Author archives settings
- Enable Author archive if you have more than one author on your blog.
- It is not a good idea to show author archives in search results so it’s better to keep it off.
- Show archives for authors without posts in search results – No
- Title template –
%%name%% - %%sitename%% - Meta description template –
Author Profile of %%name%% at %%sitename%%
Date archives settings
Date archives Disabled
Special Pages
I suggest you keep Special Pages as it is.
Breadcrumbs
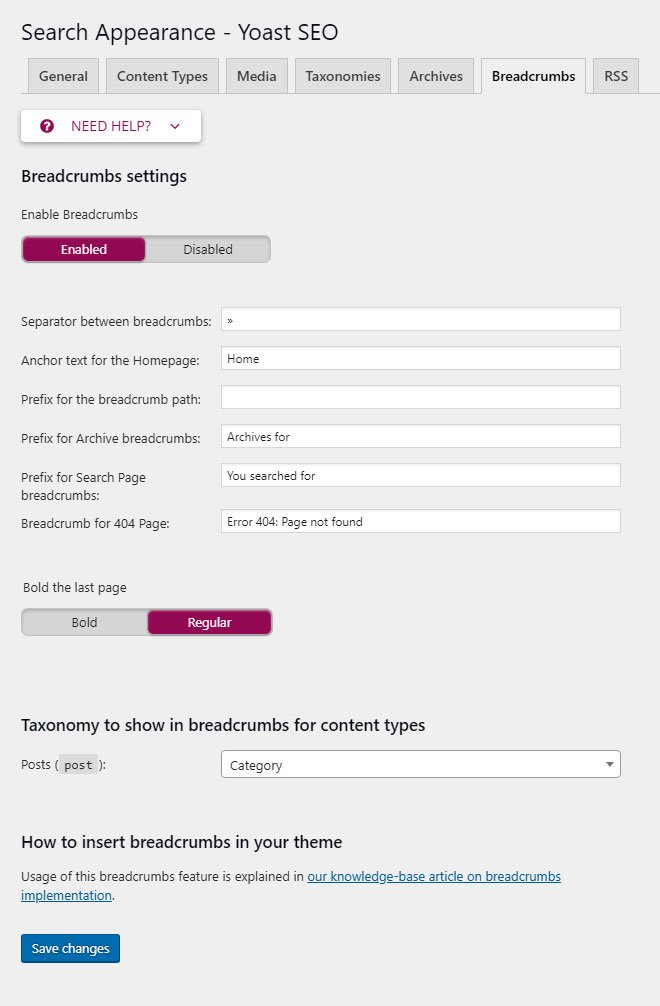
- Enable Breadcrumbs.
- Under the Taxonomy to show in breadcrumbs for post types choose Category in Posts as shown below.
- Everything About Breadcrumbs & SEO
RSS
No change required in RSS section.
Search Console
This is a good option in Yoast SEO plugin. You don’t need to login to your webmaster account for URL error (Crawl errors). Use this guide to add your site to Google Webmaster tool. Just click on Get Google Authorization Code button. The pop-out will appear, now copy your Google Authorization Code and hit Authenticate button. Done!! Now, you can check all crawl error right from your WordPress panel.
To check crawl error, go to SEO>>Search Console
You can add 301 redirects if you have the premium version. All the above configuration works on a free plugin.
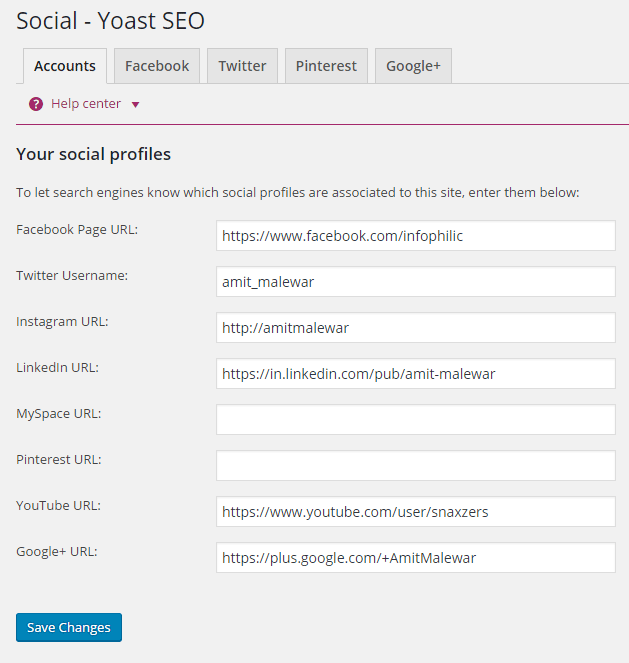
Social
Tools
Yoast comes with some very powerful tools. In tools, a section there are three tools available. Available tools are shown in the image below.
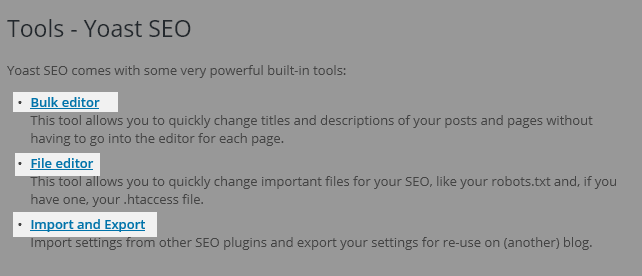
- Bulk Editor
This tool allows you to quickly change titles and descriptions of your posts and pages without having to go to the editor for each page. - File editor
This tool allows you to quickly change important files for your SEO, like your robots.txt and, if you have one, your .htaccess file. Read how to edit .htaccess file in WordPress. - Import and Export
Import settings from other SEO plugins and export your settings for re-use on (another) blog.
This is how you can install and configure Yoast SEO WordPress plugin for your blog or a website. As per my experience, these configuration gives the best performance. Also, read about the five most important ranking factors.
I’m wondering why this awesome website is not a Progressive Web App? It will help your users to easily add your website into their devices and will act like an app and can navigate it offline. Top brands already implemented it and noticed a high-performance increase.
Yea, I am aware of the Progressive web app functionality. At the moment I am not sure if I really need to focus on it or not. Hope I will use it near future.