
Do you want to add custom meta boxes to your WordPress pages, and custom post types? Creating meta boxes is a crucial part of WordPress theme development. Adding meta boxes means adding an appealing editor to the post screen and avoids forcing users to rely on custom fields.
Generally, meta boxes consist data and form fields, which allow admins to add/edit/delete posts metadata.
Although, WordPress allows us to add custom meta boxes to your posts, pages, and custom post types via the admin interface. It also provides APIs to customize the default meta boxes.
What Is Custom Meta Box?
The Custom Meta Box is a user-friendly interface that allows us to add additional information to your posts, pages, and other custom post types. It is a draggable box displayed in the post editing screen in the backend of WordPress.
Generally, each content type consists of the actual content and its metadata. Adding metadata using the default custom fields box is not always intuitive. WordPress allows developers to create and add their own custom meta boxes on post edit screens.

Adding Custom Meta Box:
Creating custom meta boxes via code is quite tricky. So to ease this task, there is a plugin available named as Advanced Custom Fields plugin.
Advanced Custom Fields is a WordPress plugin which allows you to add custom meta boxes or content fields to your WordPress edit screens. The plugin tailor the fields you want to show.
- You may also like: The Essential WordPress Plugins
Installation:
WordPress makes it easy very easy process to install any plugin.
- Simply log in to your WordPress site.
- Search for Advanced Custom Fields and install it.
- Activate the plugin.
- A new menu item labeled ‘Custom Fields’ to your WordPress admin bar.
Creating a Custom Meta Boxes:
- Click on the Custom Fields that added to the admin bar. It will redirect you to the custom fields page.

- Click on the ‘Add New’ to create a new custom field. It will bring you to the ‘Add New Field Group’ page.
Now, it’s time to add start editing your content.
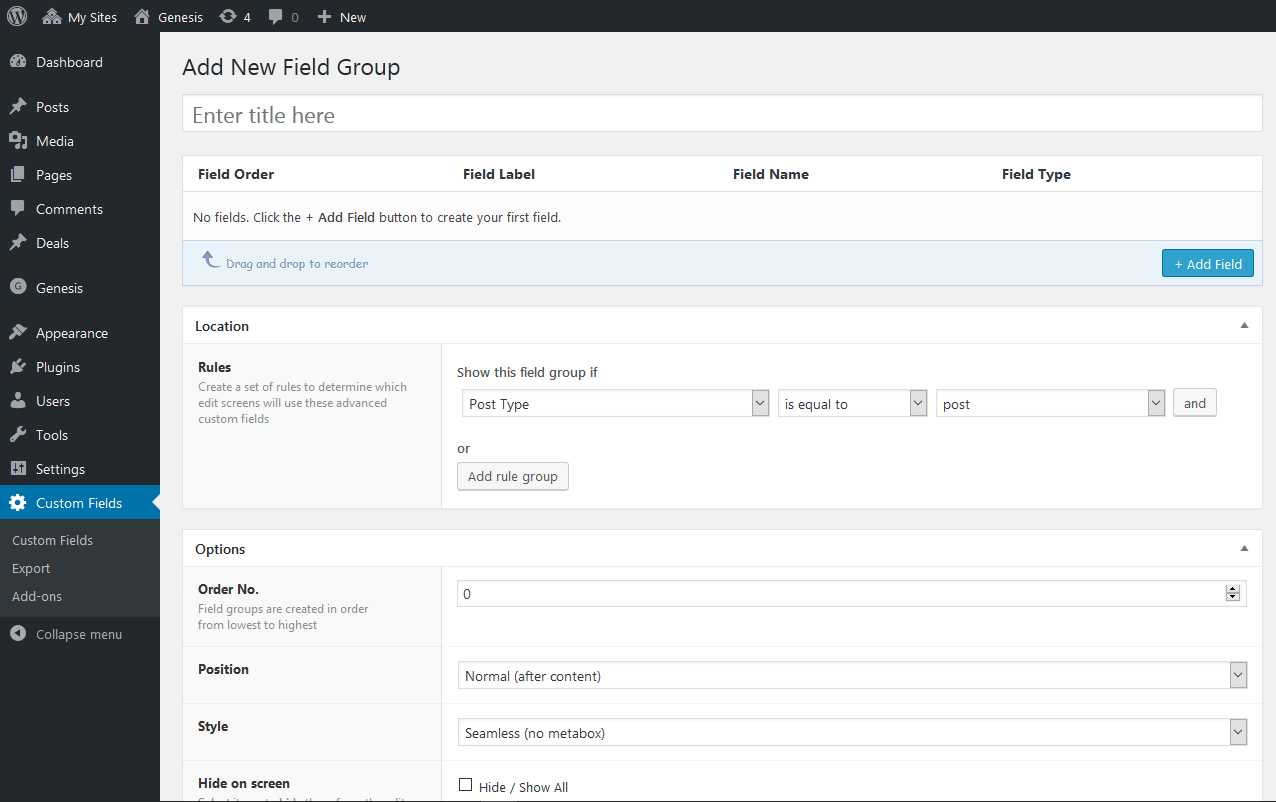
- Provide a title to your newly added field. It will be considered as the title of your meta box.
- Next, select the field type. There is a whole range of options available for example, text, images, radio buttons, check boxes, full WYSIWYG editor, etc.
- Provide the field instructions that will tell you what to add into the field.
- There are also other options available if you want to fill (as per your need).
- Click on the close field button to collapse the field.
- Now, scroll down to location section. Here you can define when and where you want your meta box to be displayed.
- Now, jump on the meta box options settings.
- First at all, choose the order number. Select the proper order number, if you have multiple field groups defined for one location.
- Next, choose the meta box position on the page.
- Below that, there is an option available to choose a style for your meta box.
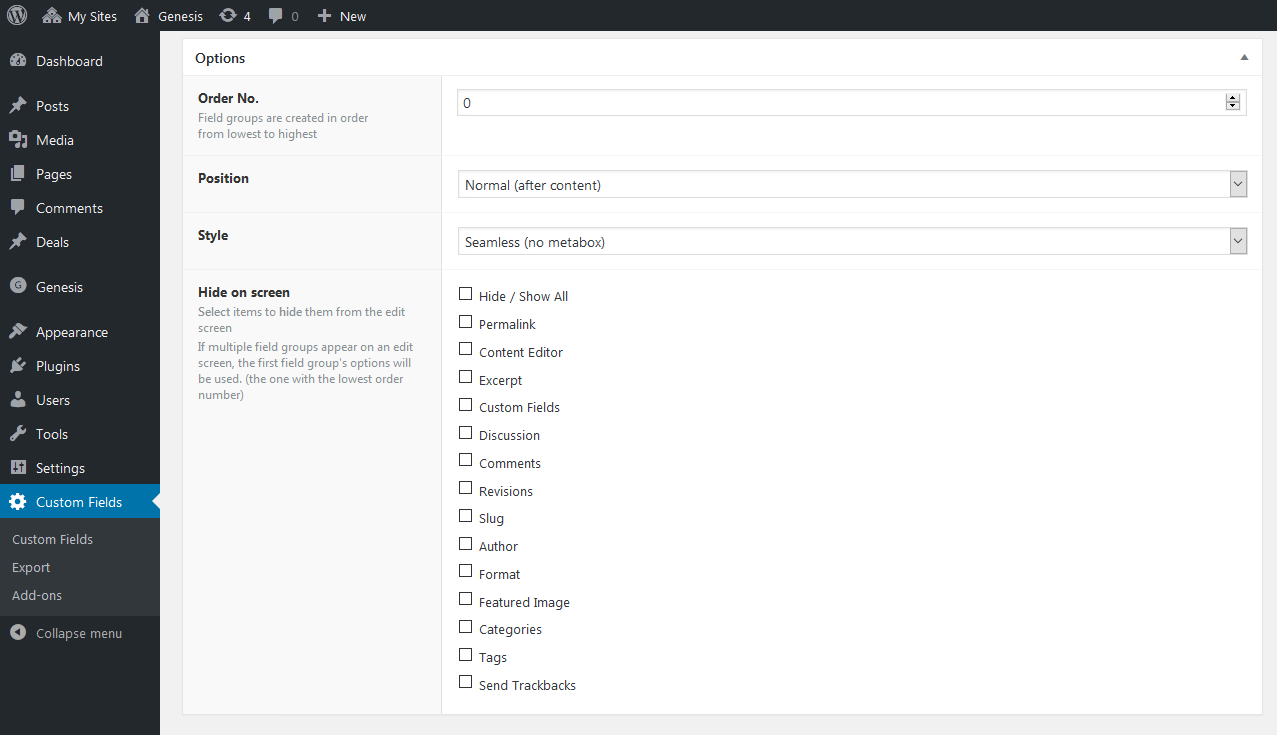
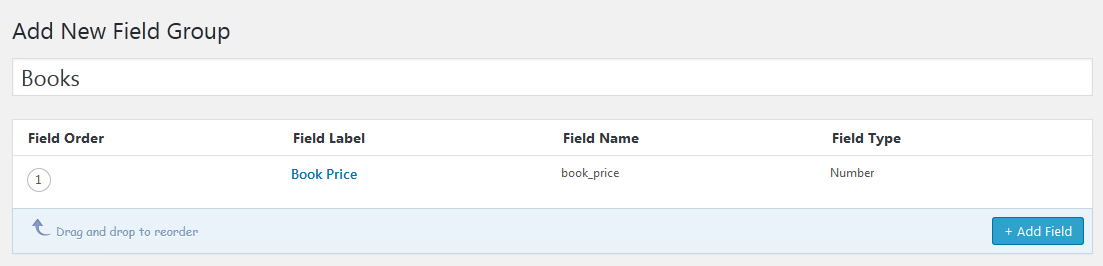
At last, you will see the list of fields that you have created. Here, you can hide the field if you want by checking here. The best way is to keep unchecked.
- Click on Publish.
Now, You are done with adding a custom meta box to your WordPress post or post type.
As you successfully added the meta field, it is also necessary to show it on your edit screen. So, your next step will be displaying the data stored in those fields on your WordPress theme.
To do so, edit the custom field group on the ‘Edit Field Group’ page you created earlier.
You will need the field name to display on your site. There are 2 ways to do this.
- Using a shortcode
- Adding few lines of code to your WordPress theme files
Using Shortcode:
[acf field="article_byline"]
You can use following shortcode to display a custom field into your post.
Adding few lines of code to your WordPress theme files:
Here, you need to edit the theme file where you want to display the data. While doing this, make sure that you are adding code in WordPress loop.
<?php while ( have_posts() ) : the_post(); ?>

<h2 class="article-byline"><?php the_field('article_byline'); ?></h2>

<?php endwhile; // end of the loop. ?>
The code will also help in formatting and style the custom field later while adding custom CSS into our theme.
Now check if the custom field is added to the post where you have previously entered the data. There will be your Custom Meta Data displayed.
Wrapping Words:
I know, adding a Custom Meta Box to your post is quite tricky. ACF made it easy with its powerful options.
I hope this step by step guide helped you in adding custom fields to your WordPress posts or post types. You can add any type of field as a subfield which allows you to create and manage very customized data with ease.