
Your blog is made up of posts, which are simply entries listed in reverse chronological order on your blog’s homepage. These posts are meant to be timely and written regularly to keep your site updated with fresh content.
To achieve the best statistics, it is crucial to have well-written content on your website that is optimized for the web. This will help your website acquire the top position in search results and keep readers engaged.
How to write an article?
Before starting,
- Decide on article writing topics in your niche.
- Find out trending topics in your niche.
- Collect enough relevant information.
- Do keyword research.
You are now ready to create an excellent article for your intended readers. Fortunately, creating a new article in WordPress is a simple process.
With the WordPress Editor, you can easily design pages and posts with multimedia content and manage their layout.

The latest version of WordPress, 5.0, introduced the Gutenberg editor.
This guide will focus on creating an original article using Gutenberg.
In my earlier guide- ‘Introduction to Gutenberg,’ I have shared some exciting characteristics of Gutenberg.
So, let’s start step by step to create a new article in WordPress using Gutenberg.
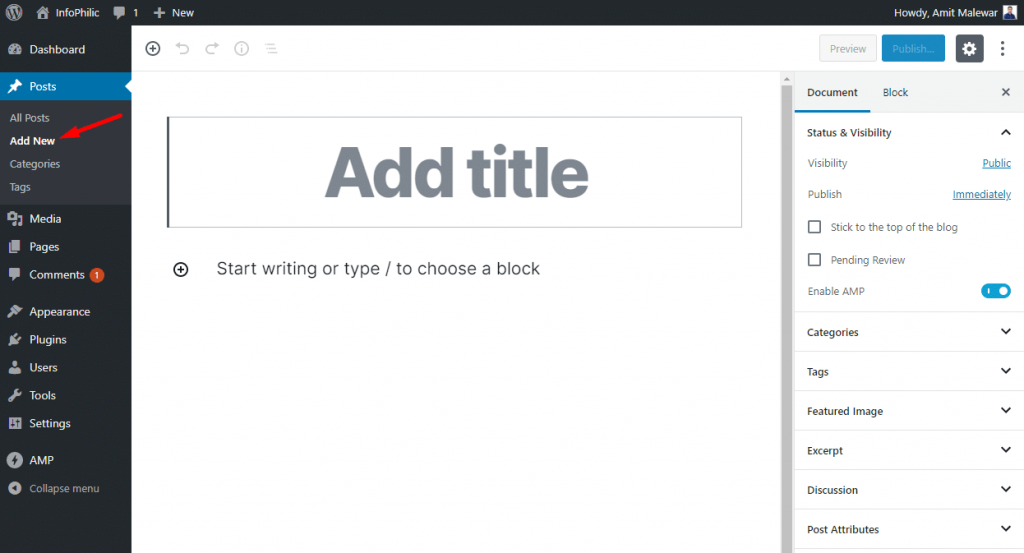
- Go to the posts section from your site Dashboard.
- Click on Add New to create/write a new article.
- Enter the Title for the new post in the Title Box indicating ‘Add Title.’
- Beneath, you can see the + symbol with the message ‘Start writing or type/ to choose a block.’ Click on the block and start writing.
Gutenberg comes with blocks, a great new tool for building engaging content. With blocks, you can insert, rearrange, and style multimedia content with very little technical knowledge. Instead of using custom code, you can add a block and focus on your content.
Each time you enter after completing a paragraph, it will automatically create a new block for the next paragraph. You can also insert an image or embed a video to create a new block in the middle of the article.
However, if you want to add something different, you can click on the add new block button on the editor’s top left corner, below an existing block, or the left side of a block.
Formatting text:
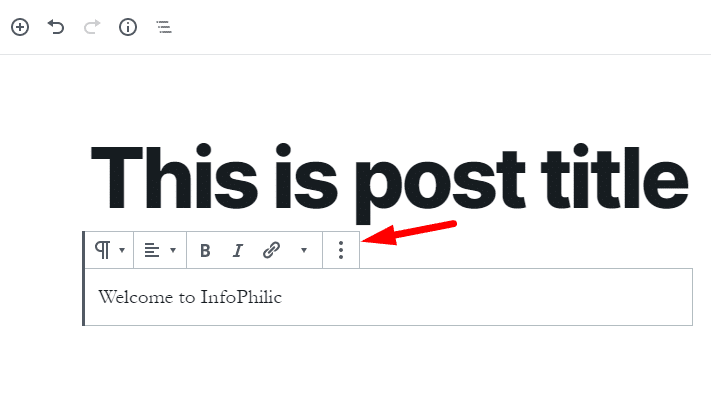
Each block comes with its toolbar, which appears on top of the block.
By default, the next block is a paragraph block. The paragraph block shows necessary formatting buttons like text alignment, bold, italic, insert-link, and strikethrough buttons.
You can format text according to your requirements.
Besides toolbar, each block has its settings, which would appear in the right column of your edit screen.
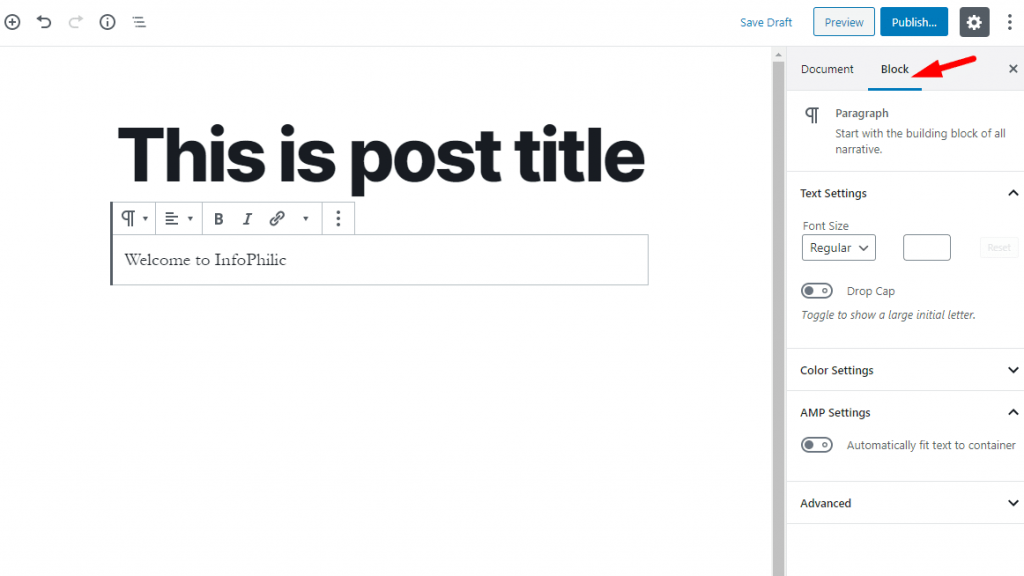
Here, you can change the font size of the block, change the color, change the text color, etc.
Moving blocks:
What if you want to add the third paragraph after first and second after third?
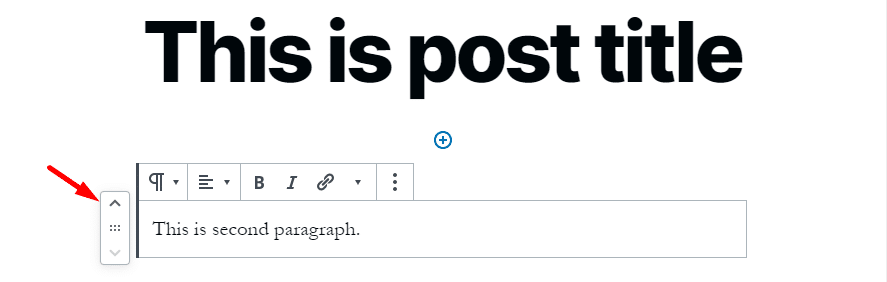
In Gutenberg, you can move blocks up or down by simple drag and drop or click the up and down buttons next to each block. There is no need for Cut/Copy + Paste or rewriting the entire block.
Inserting link:
As I said above, each block comes with its toolbar. If you want to insert a link to a specific work in the block,
Select the word, click on insert link, and Add link.
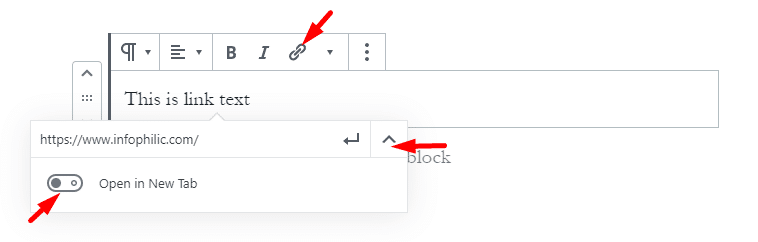
You can choose to open links in a new tab by clicking on Link settings and enabling ‘Click in New Tab.’
Insert an Image:
An image speaks thousands of words. You might be aware of the benefits of adding images to the content.
To add image,
Create a new block.
In the toolbar, search for an image tool.

Click on the image icon.
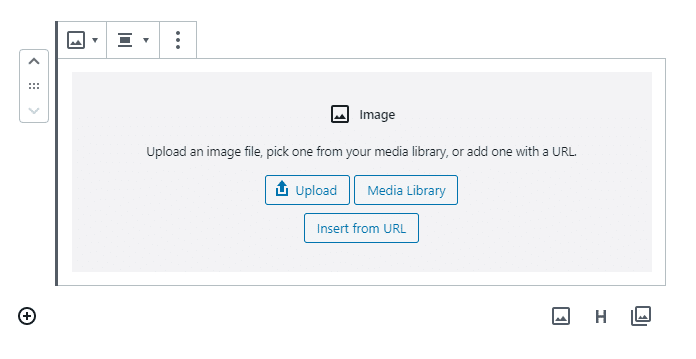
You can upload a new image directly, or If you have already uploaded images in the media library, then select Media Library, or you can also paste an image URL.
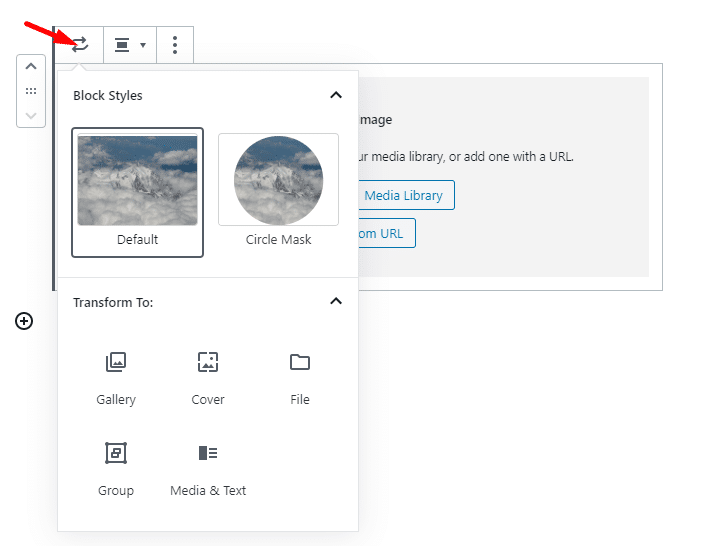
You can also transform Image block to Gallery, Cover, File, Group, Media & Text.
Embedding video:
From the toolbar, search for Video block. Click on the video icon.
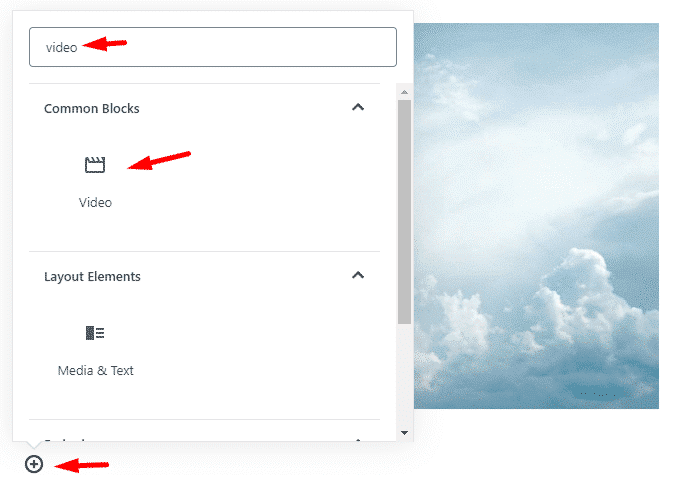
Here you can upload a new video directly, or If you have already uploaded a video in the media library, then select Media Library, or you can also paste a video URL.
Gutenberg offers excellent compatibility with popular video streaming sites such as YouTube, Vimeo, etc.
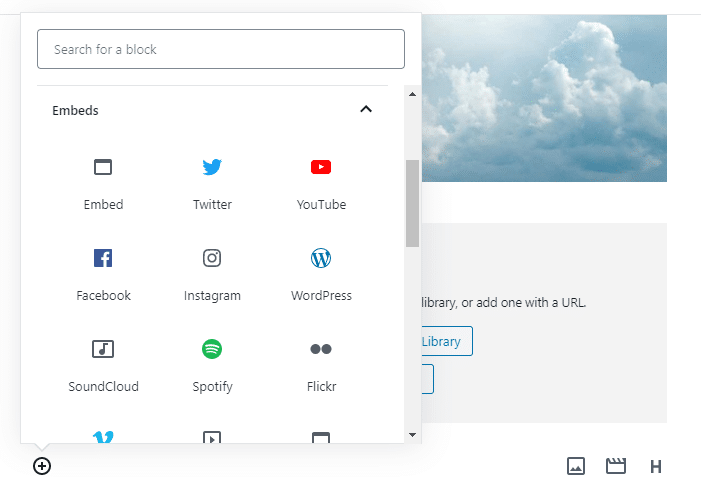
Search YouTube or Vimeo from Toolbar. Select the YouTube or Vimeo block and paste the URL of the video.
That’s it.
Embedding Tweet:
Several times, you might want to embed the tweet into your content. In such cases, Open a tweet, which you want to embed in your content, in a new tab.
Copy the embed code tweet from Twitter.
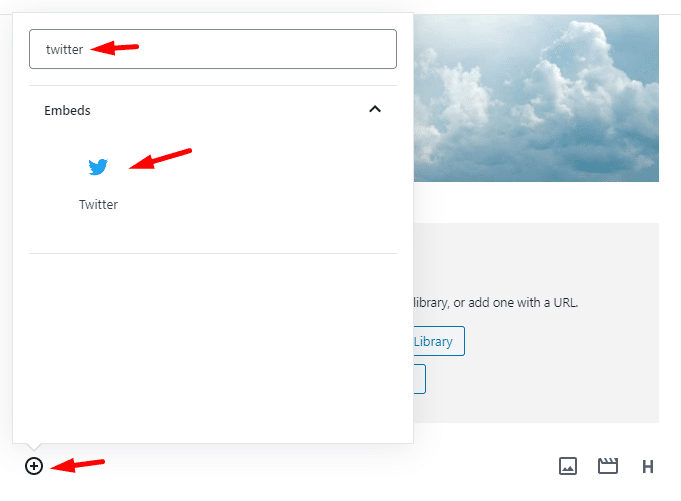
In the editor, create a new block, search for Twitter from Toolbar. Paste the code or URL of that tweet.
Hush! So, it is all about content.
Now, let’s shift to publishing and managing options in Gutenberg.
Publishing and Managing Options in Gutenberg
These options are nothing but your post settings, such as publish dates, categories, and tags, featured images, and more.
Status and Visibility:
It is an audience selector tool that helps you choose who you want to share something with.
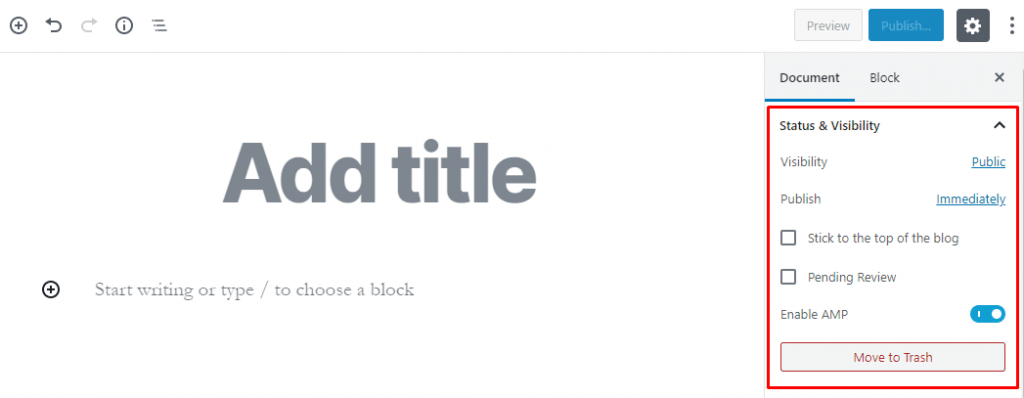
For example, you can set it to Public if you want to display your content to all.
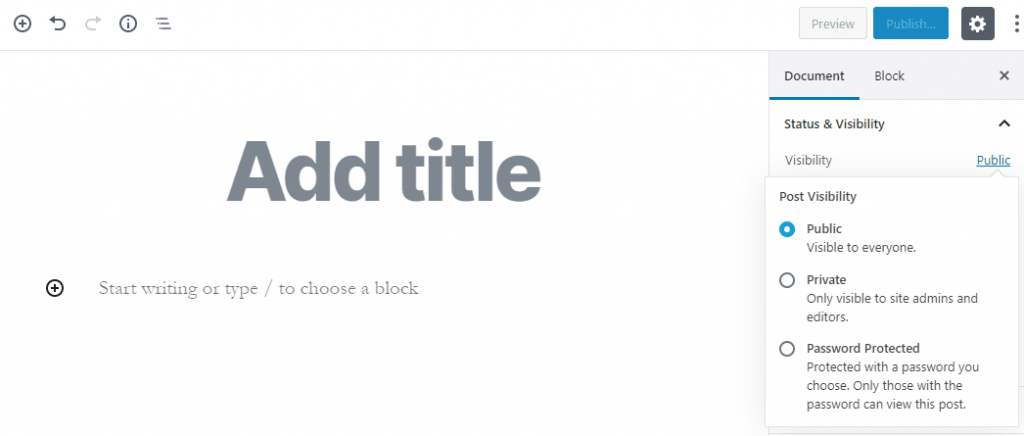
Selecting it to Private will display your content to Site admins and other editors.
Keeping it password-protected will protect the content with a password you choose. Only those with the password can view the post.
- Permalink:
The permalink is the full URL you see – and use – for any given post, page, or other pieces of content on your site. It’s a permanent link, hence the name permalink.
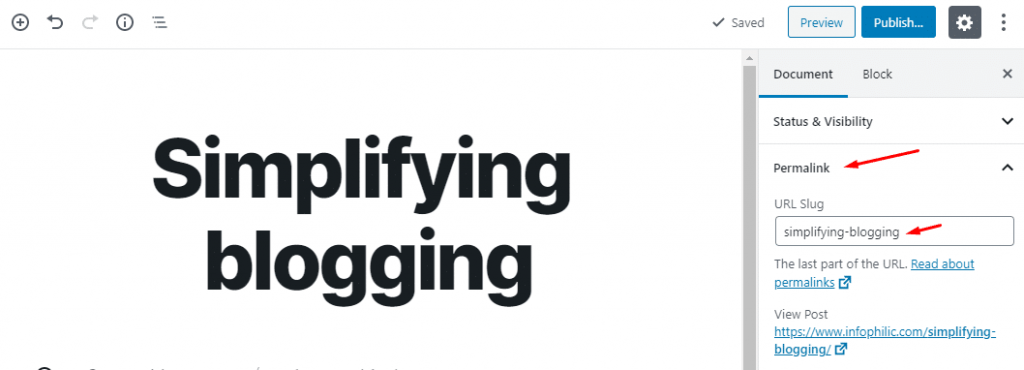
You can edit permalink by clicking here.
- Categories:
If you have multiple categories in your blog for several content types, all the categories will display in this section.
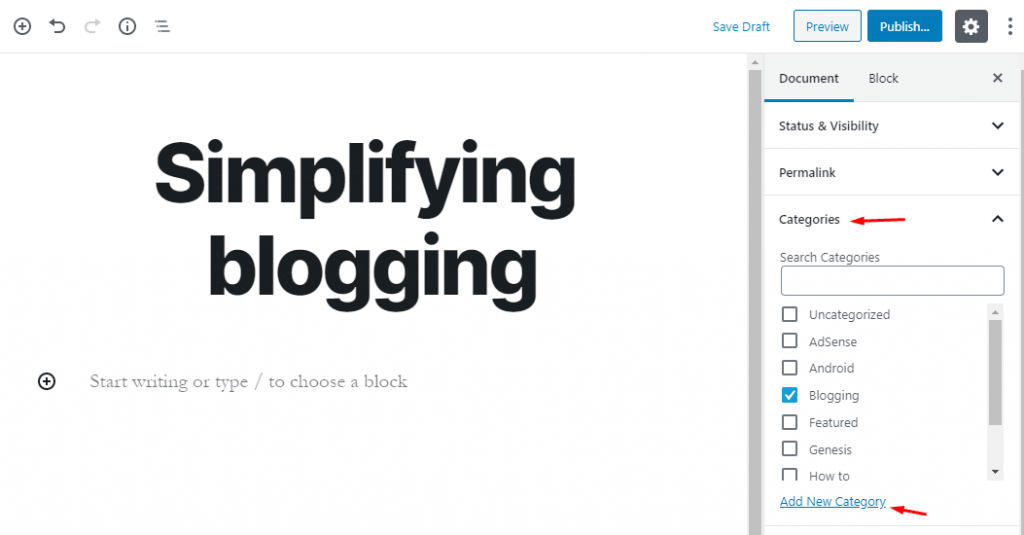
From this section, you must choose the category in which your new content falls. You can also add a new category by clicking on Add new category option.
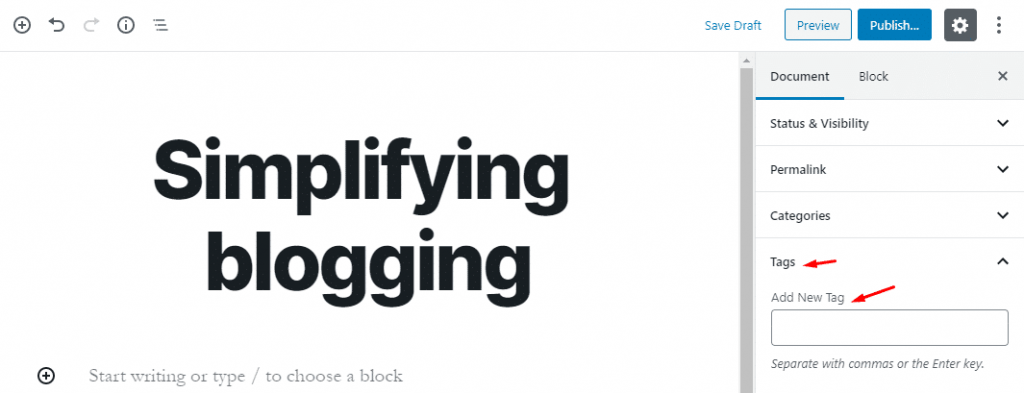
- Tags:
Tags are nothing but the keywords that highlight your content. In this section, insert tags related to the content. You can add multiple tags by separating them with a comma “,” or Enter key.
- Featured image:
Featured images (also called Post Thumbnails) represent an individual Post, Page, or Custom Post Type.
From this section, you can set a featured image for your post.

Click on Set featured image. You will be directed to a new screen. You can upload a new image by clicking on the Upload image, or you can select an existing image from the media library.
- Excerpt box:
An excerpt is an optional text associated with a Post. Most of the time, it is used as the Post summary.
If you want to show a post summary to your visitors, here, you can type Excerpt.
- Discussion:
Most of the site owners use comment boxes for review or user feedback.
If you are one of those users and want to show or hide the comment section, you will find that setting.
Hence, you are all set by writing a blog post for your WordPress blog.
If you have any queries, ask me here by commenting below.