![How To Create an Engaging Multi-Page Form [Step-by-Step]](https://www.infophilic.com/wp-content/uploads/2020/07/wpforms-for-wordpress.png "wpforms for wordpress")
A multi-step form is a long-form broken down into multiple pieces/steps to make otherwise long forms easier to complete.
Unlike conventional long forms, a multi-step form can increase the site’s form conversion rate, especially if the form has more than 3 form fields. It additionally encourages users to complete the information you want when it’s broken down into pages rather than presented as one long-form.
How to create a multi-step form in WordPress?
First of all, you are going to have to ensure that WPForms is installed on your WordPress site.
Now, go to WPForms » Add New to create a new form.
In this guide, I will create a simple contact form.

I’m sure you are on the Form setup tab.
Now, name your form and select the template you want to use.
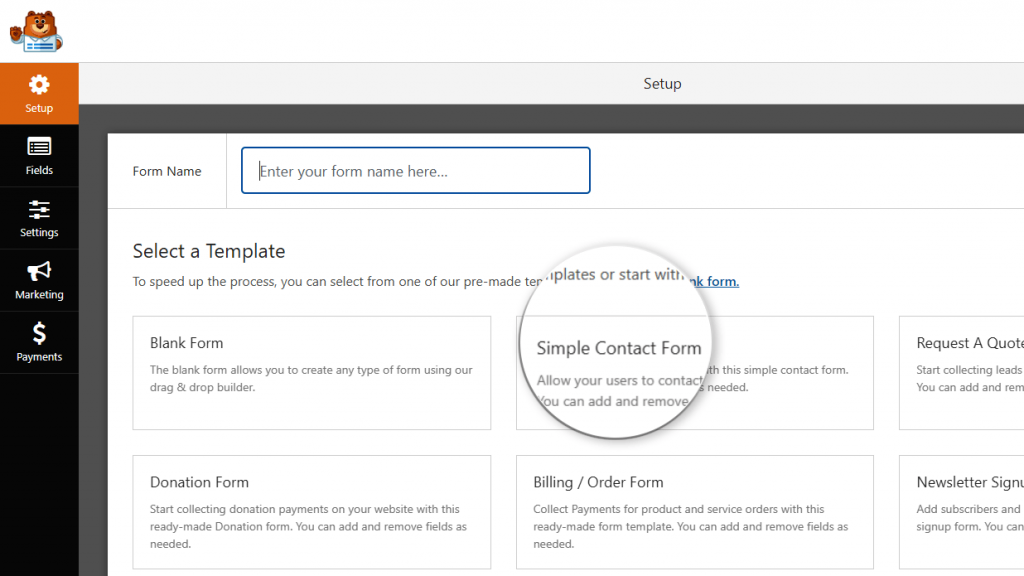
Here, I’m choosing the Simple Contact Form template.
WPForms will create a simple contact form in the drag and drop builder.
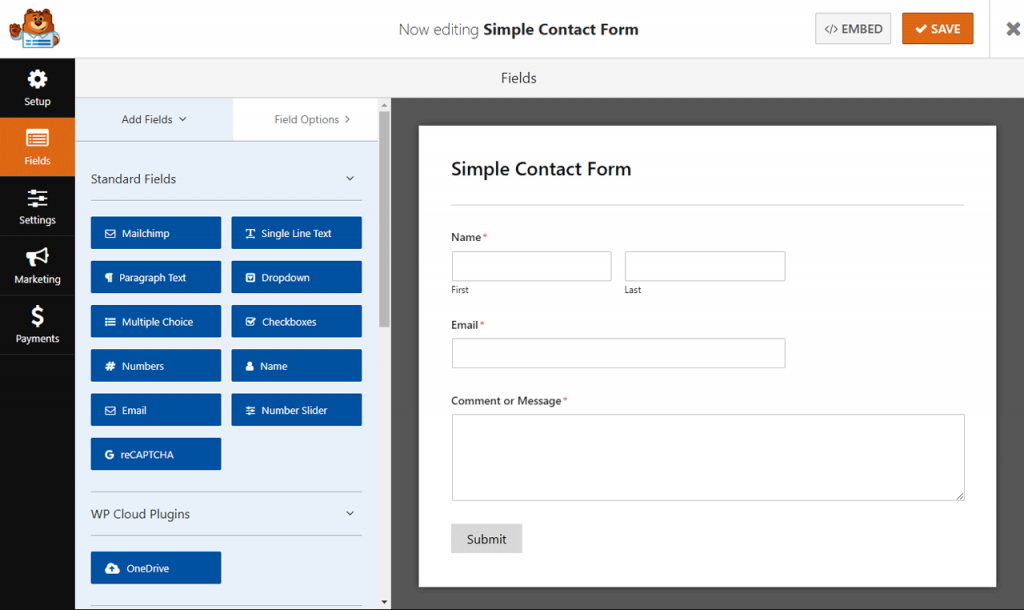
Now, you are automatically redirected into Fields tab, from where you can add additional fields to your forms by just dragging them.
You can also click on an existing form field and drag it to rearrange the order on your contact form.
The next step is to split your form into different parts
After adding a field to the form or editing the form, you need to add the Page Break form field to your site to split it into different pages.
Page Break field is found under the Fancy Fields, just below the Standard Fields.
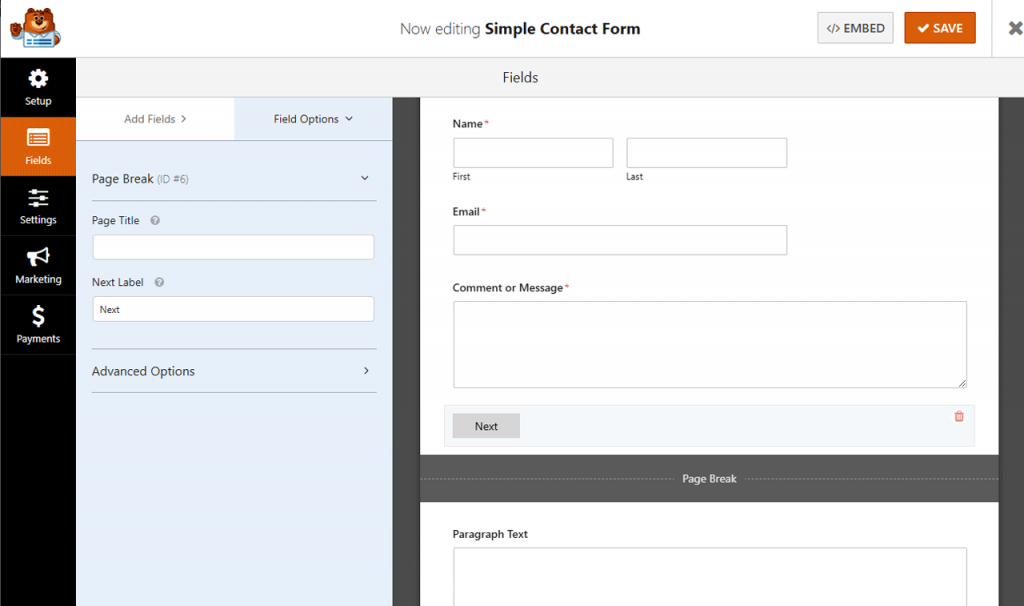
Place the field from where you want to split the form.
You can add the Page Break field anywhere you want. And fascinatingly, you can add additional form fields from there to complete your form.
Moving ahead, it’s time to customize the Progress Bar
Suppose you want to show the progress indicator to let users know about the different sections of your form. This way, they always know where they’re at on your form and how much they have left to fill out before clicking “Submit” based on progress bars.
To make it easier, WPForms has three different breadcrumb style indicator bars:
- Connectors: shows a connecting bar and page titles of each part of your multi-stage form.
- Circles: shows one circle and page title per page on your multi-step form.
- Progress Bar: indicates the progress of the form as the user fills it out.
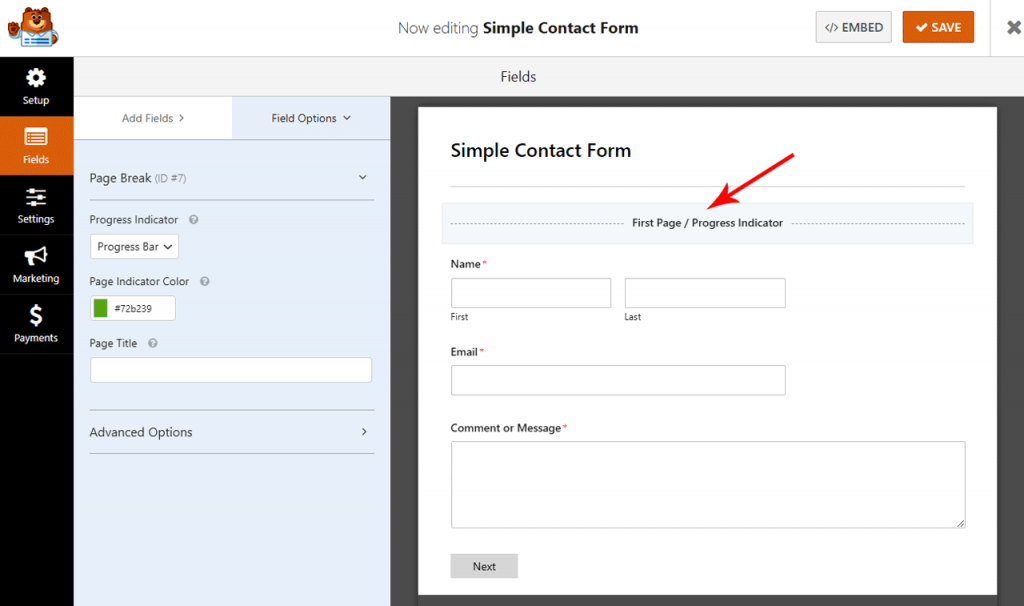
For customizing the progress bar, you need to click on the First Page break section.
Here, you will see a new panel in the Form Editor, from where you can choose one progress bar. There is also an option for changing the color of the progress indicator.
What’s more, you can change the page title, so users know which part of the form they’re on if you choose the Circles or Connectors option.
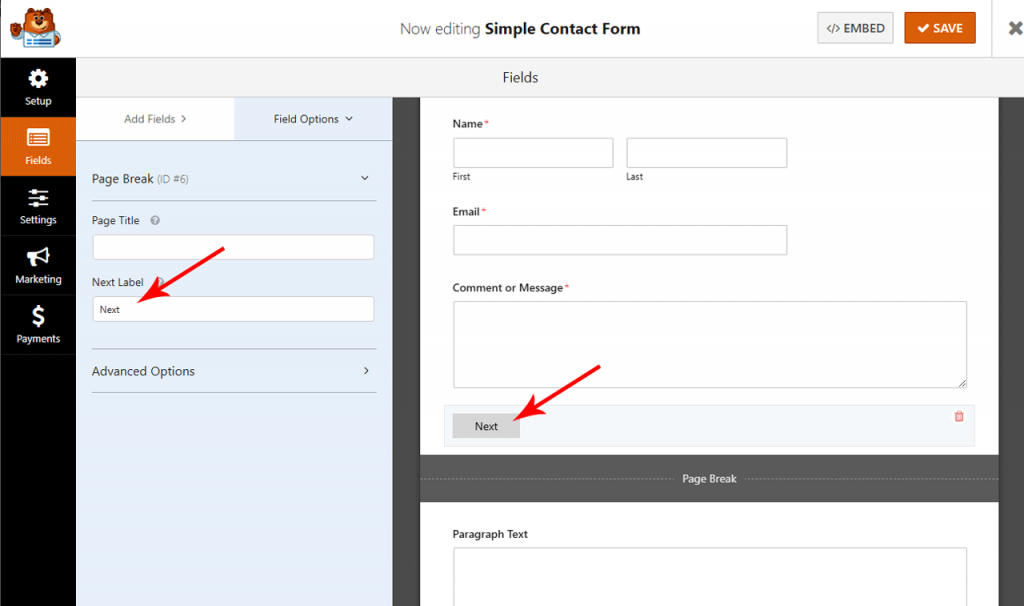
To customize the next page title and the button taking site visitors to the next page on your form, click on the Page Break section you created when you added the page break to your form.
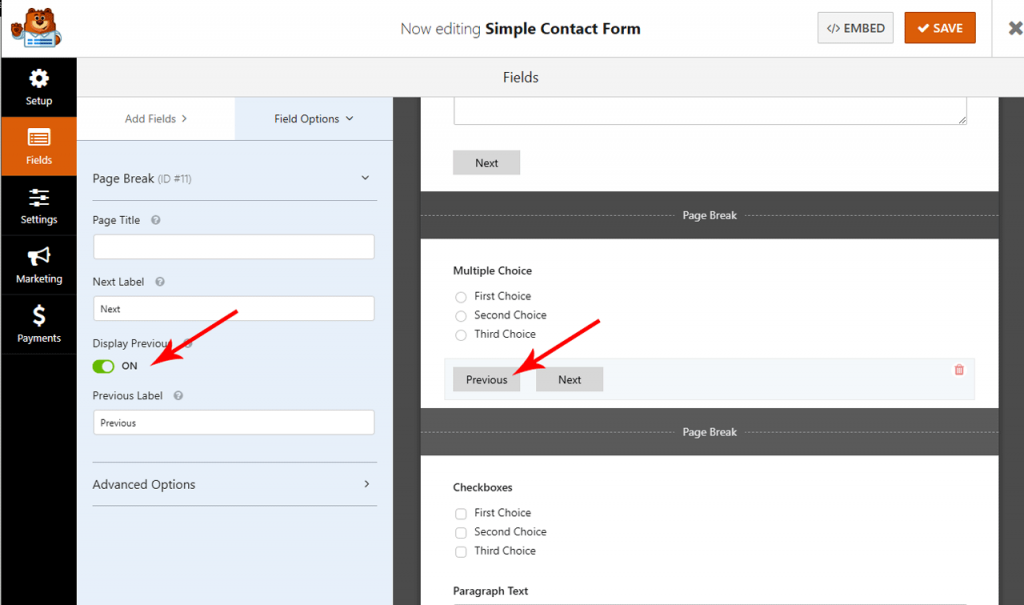
You can also enable a feature that will show a Previous Page button on your form. This will allow your visitors to return to the previous page of your form if they want.
Once done, click on Save.
Time for the configuration of form settings
From the Settings tab, go to General.
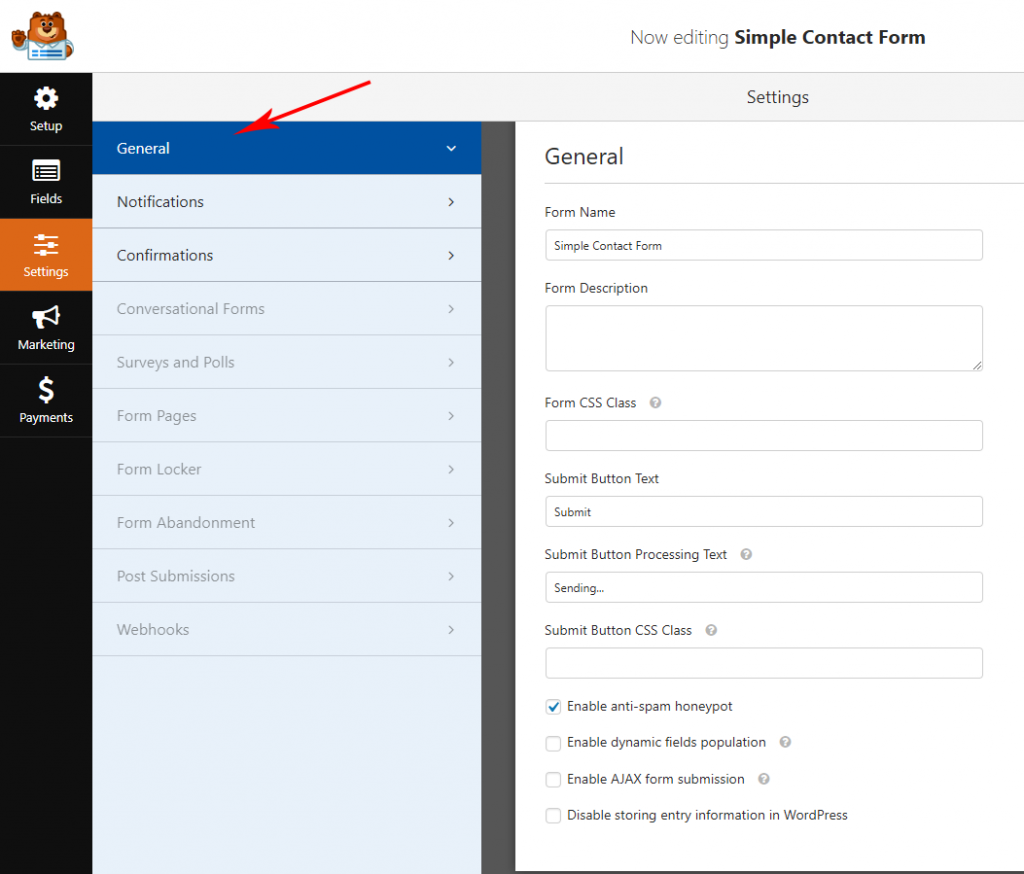
You can configure:
- Form Name: You can change the name of your form here.
- Form Description: You can add a description of your form.
- Submit Button Text: Customize the copy on the submit button.
- Spam Prevention: Stop contact form spam with the honeypot feature or Google reCAPTCHA.
Spam Prevention feature is automatically enabled on all WordPress forms. In case, if you wanna use another form of spam prevention, unclick this option.
- AJAX Forms: Enable AJAX settings with no page reload.
- GDPR Enhancements: You can disable the storing of entry information and user details, such as IP addresses and user agents, to comply with GDPR requirements.
Once done, click on Save.
Let’s jump to the configuration of the form’s notifications
From this section, you can choose whether you want to receive notification for a new entry (user’s submission).
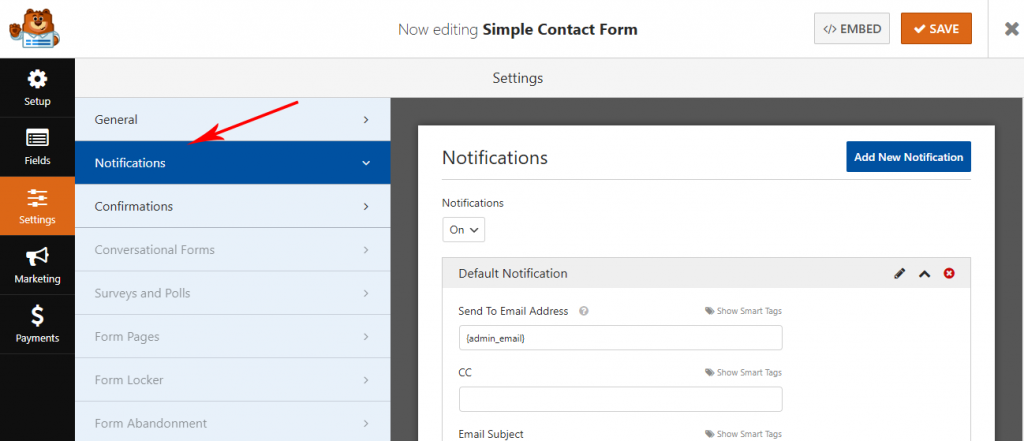
If you use Smart Tags, you can also send a notification to the user’s email address when they submit a form, letting them know you received it and will be in contact shortly.
The next step includes setting up the form’s confirmation
Form confirmations are acknowledgments messages that appear to visitors after submitting a form. They ensure visitors that their form has been processed.
WPForms has three confirmation types to choose from:
- Message: This is the default confirmation type in WPForms. When a site visitor submits a form, a simple message confirmation will appear, letting them know their form was processed. Look here for some great success messages to help boost customer happiness.
- Show Page: This confirmation type will take site visitors to a specific web page on your site, thanking them for their form submission. For help doing this, check out our tutorial on redirecting customers to a thank you page. Also, be sure to check out our article on creating effective Thank You pages for boosting customer loyalty.
- Go to URL (Redirect): This option is used when you want to send site visitors to a different website.
To start, click on the Confirmation tab. Now, select the confirmation type from the dropdown. Here, I’m going to choose the Message type.
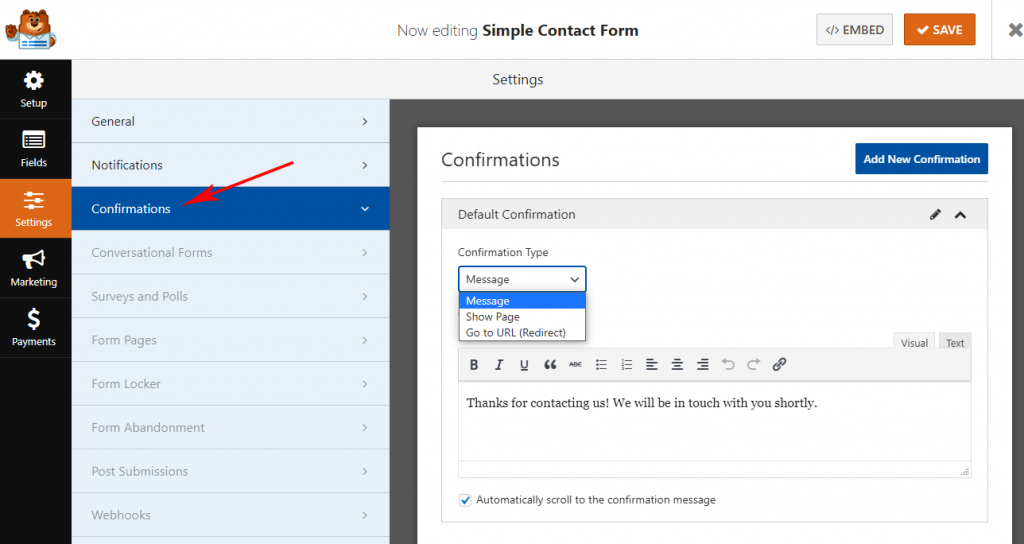
After this, you have to create a confirmation message under the Textbox appearing.
Once done, click on Save.
Now, you are all set to add your form to your website
To start, create a new page or post from your WordPress. After that, click inside the first block, search for WPForms, and select the WPForms icon.
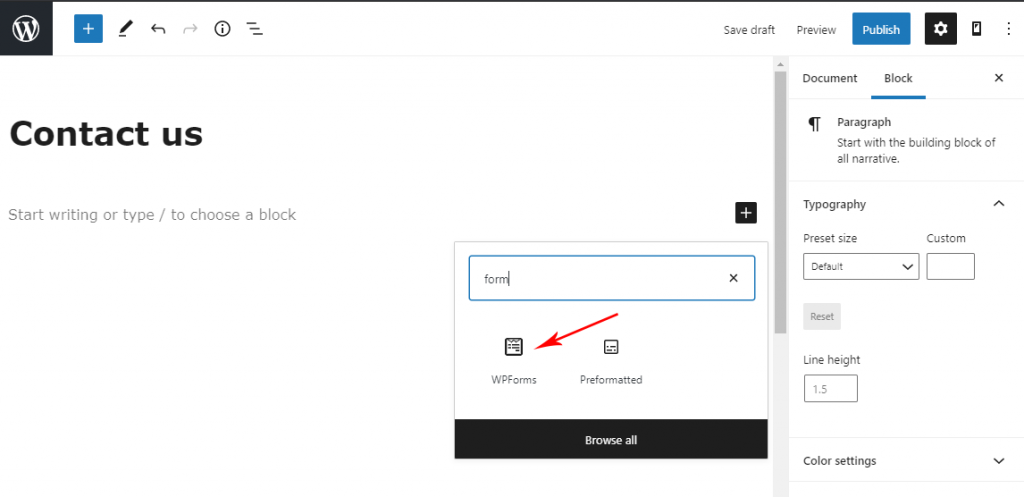
The WPForms widget will appear inside of your block. Click on the WPForms dropdown and pick which one of the forms you’ve already created.

Publish your post or page so your contact form will appear on your website.
That’s it. This is how you can easily create multi-step forms in WordPress using WPForms plugin.
