
Hey, glad to know you’re serious about your blog and planned to go with Self-hosted WordPress blog. In the previous tutorial, I told you how to create free website or blog. So today I am going to introduce with all new fully loaded self-hosted WordPress site.
Self-hosted WordPress site is a key for most of the successful bloggers. It enables all the locked features in the free WordPress. Let’s have a quick look at some key features of Self-Hosted WordPress site.
Search Engine optimization
WordPress is optimized for the search engines. For more fine-grained SEO you can take help from SEO Plugins.
Own Your Data
Using self-hosted WordPress means no one has control over your contents, database, media files.
Plugin System
You can install various plugins to improve your site. There are so many both free and paid plugins available in the plugin directory.

Theme System
Having great user interface works well to impress the visitors. There are lots of both free and paid themes available in the theme directory. For premium themes, you can go for ThemeForest which is one of the best themes distributor for developers.
To have self-hosted WordPress blog you need hosting (Linux or WordPress hosting). You can buy a domain and hosting plan from any host providers. I personally recommend Bluehost to start your blog or a website. Bluehost gives you free lifetime domain with hosting plan. So, once you buy a hosting you can go further for the WordPress installation.

Two ways to create Self-Hosted WordPress Blog
You can install WordPress on your host either via Softaculous or manually.
Using Softaculous
Go to your hosting site and log into Cpanel using username and password.
Once you open the Cpanel successfully, scroll down to Softaculous App Installer section.
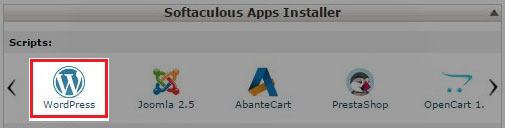
In the Softaculous app installer, click on the WordPress icon. The following screen will appear.
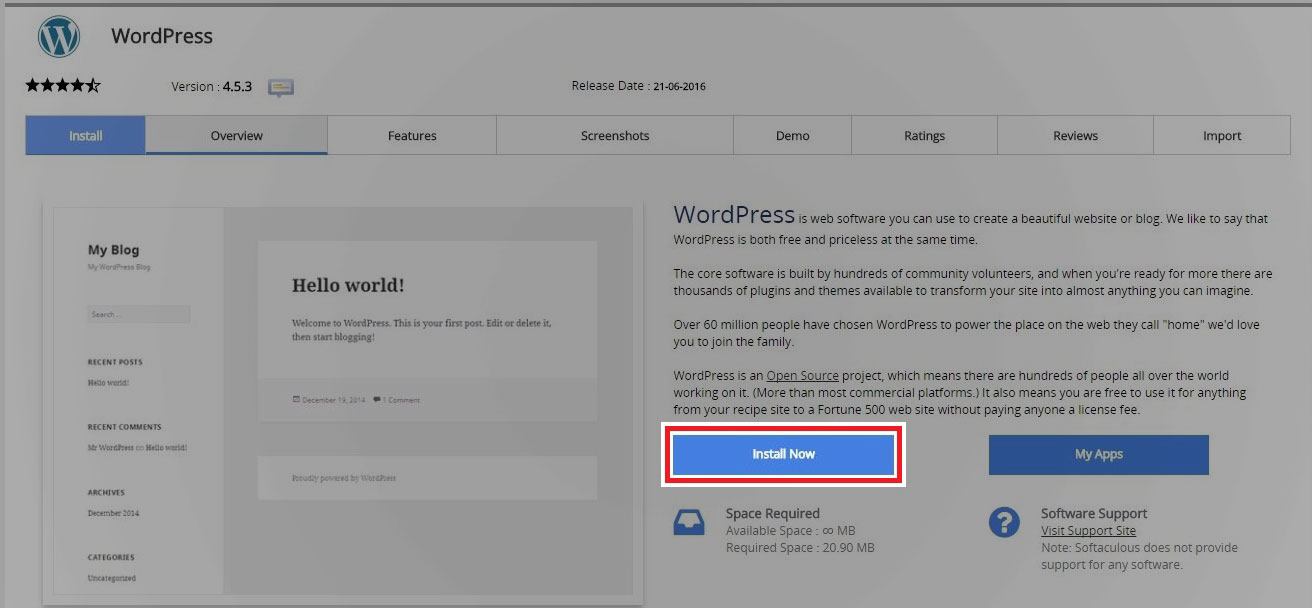
This is what you have to install click on the Install Now button to start installation configuration. The next window will appear where you have to input required data. Click image to view in full screen.
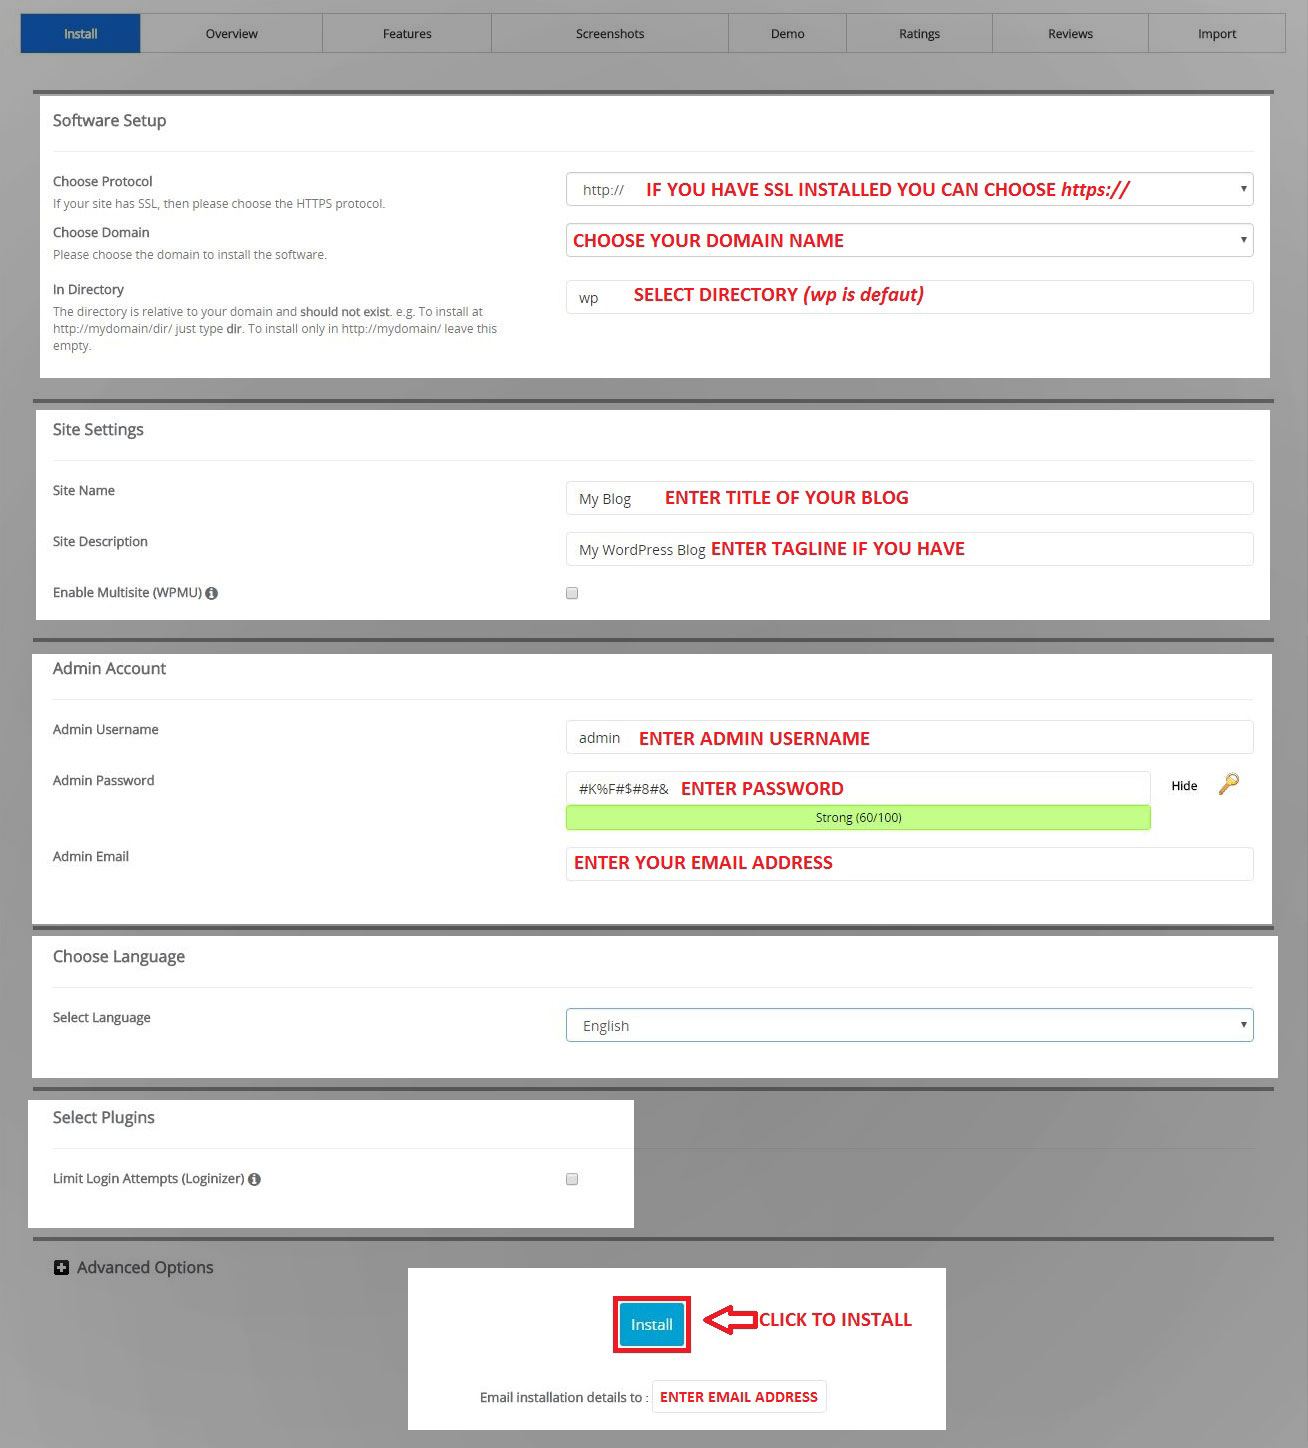
Input all the required data and click Install button at the end of the form. Make sure you have entered your correct email address in Email installation detail to field.
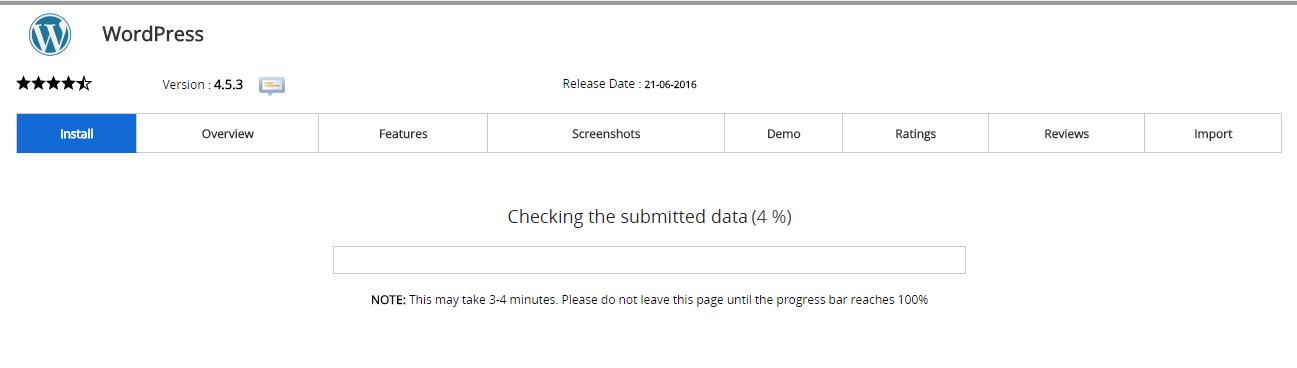
You will receive an e-mail after successful installation. This e-mail will contain your WordPress username, password, and some important links like the link for your admin panel.
Now, you can log in to your WordPress admin panel to make further changes like theming, writing articles and page.
Whoa, you are done with WordPress installation. Enjoy Blogging.
Manual installation.
For manual installation, you need some basic knowledge about the database and coding.