
WordPress is a great and primarily considered CMS platform when it comes to starting a new blog. Simple yet free- WordPress can be easily used by anyone, even without any technical or coding knowledge.
Having the best CMS does not drive your website. It needs a combination of CMS, and excellent web hosting does.
Though, out of various hosting provider companies, how can you choose the best and great?
So, there are several factors to consider while choosing the best web hosting. In my Best Managed WordPress Hosting guide, I have covered all those factors.
Despite all of the best companies, I choose to go with Dreamhost web hosting. Why?

As you might hear, great things are always admirable, and in my opinion, this investment is well worth it.
How did I migrate to Dreamhost?
A quick search on Google for ‘WordPress web hosting’ took me to the DreamHost.
As their statement suggests, DreamHost makes it easy to start your online journey off on the right foot, seriously, I must say, I experience the same. Its been three years, I’m using DreamHost and never thought of migrating on another hosting.
Benefits I received on DreamHost:
- Unlimited Bandwidth & Storage
- FREE Email Addresses
- One-click migration
- FREE Privacy Protection
- Free SSL
- Automated Backups
- Instant Setup
In other words, DreamHost offers aspiring website owners a great starting place.
DreamHost offers two essential plans:
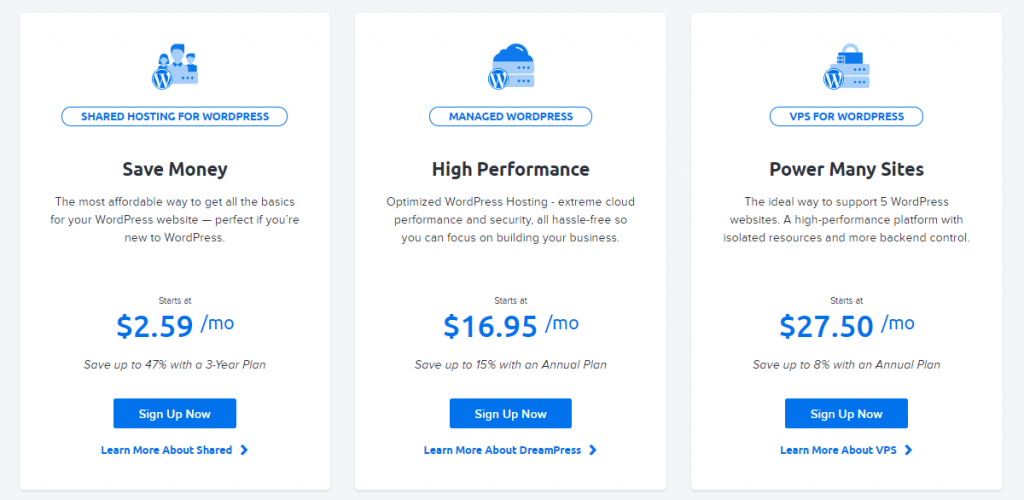
1. Shared Hosting:
I recommend beginners to go with Shared Hosting plan.
Features:
- Top-notch technology
- Fast Solid State Storage
- Optimized servers
- Resource protection
- 100% Uptime Guarantee
They offer two plans in Shared Hosting:
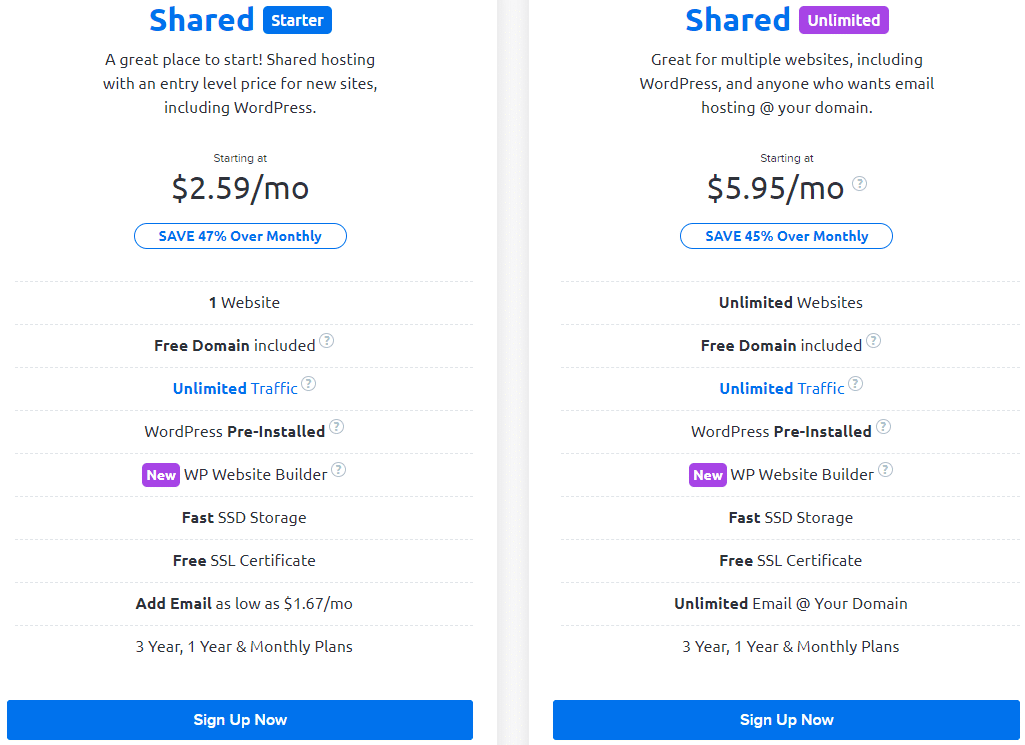
The Shared Starter plan comes at costs $2.59/month and Shared Unlimited at cost $5.95/month.
There is just a minor difference between these two plans. In the Shared starter plan, you have to purchase Custom Email options separately at a cost starting $1.67/mo, whereas, in the Shared Unlimited plan, you get a free Unlimited Email option and can host more than one website.
2. Managed Hosting:
Their managed plan is also known as DreamPress Hosting.
If you have lots of traffic and you want a fast, reliable, and flexible site, then the DreamPress plan is recommended.
Managed WordPress Hosting Plans includes three plans:
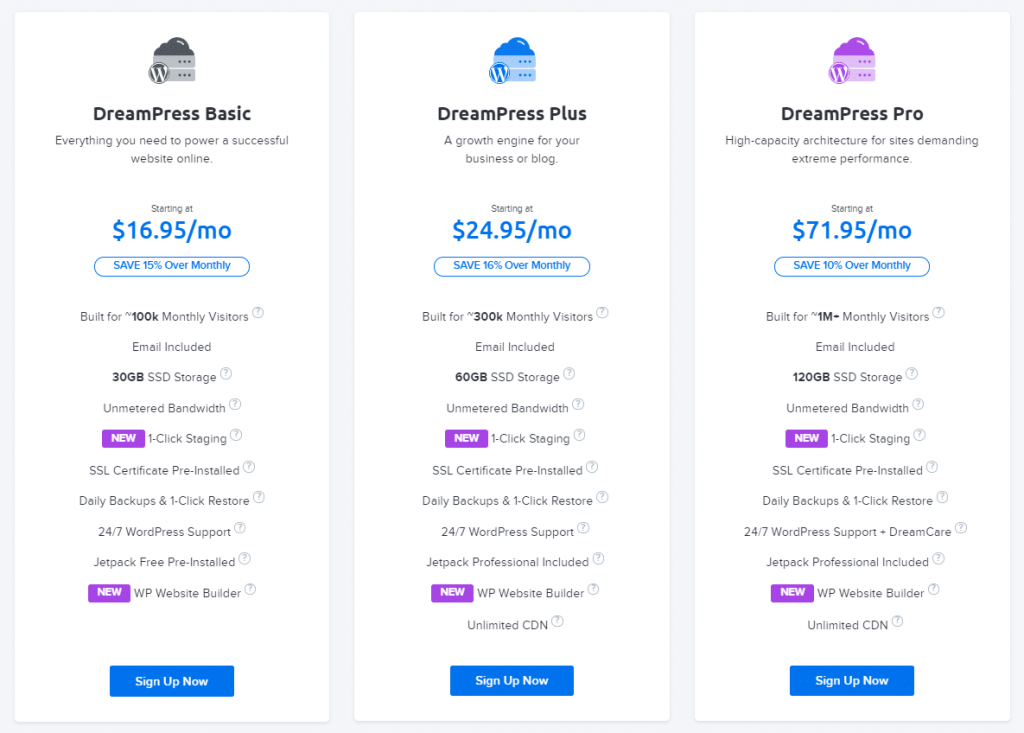
1. DreamPress Basic starting at cost $16.95/mo for up to 100k monthly visitors
2. DreamPress Plus starting at cost $24.95/mo for up to 300k monthly visitors
3. DreamPress Pro starting at cost $71.95/mo for up to 1M monthly visitors
In this guide, I will tell you how to start a website or blog with DreamHost (Shared Hosting)
Let’s start:
Step 1: Find Your niche
Niche means what your blog or site is about. To find your niche, identify your interest, passion. Keep in mind that your niche should be unique as it will be your blog’s identity.
Step 2: Decide the name of your blog or site:
The name should resemble the niche of your blog or website. While choosing the name, you should be choosy. It should catch your visitor’s attraction. Importantly, don’t try to copy other’s site/blog names as it will get challenging to rank.
Step 3. Choose a CMS:
CMS is an abbreviation for Content Management System. Among all CMSs available in the market, I observed WordPress is best as it lets you style your blog using themes, and add new features via plugins. It also helps to make your blog more secure and perform better with minimal work required on your end.
So, Keeping all necessary and beneficial factors in mind, I recommend to go with WordPress only.
Step 4. Choose a Web Hosting and register your domain name:
As we talked above, here we will go with DreamHost.
Signup with Dreamhost:
Sign Up Now on DreamHost plans page.
Next, choose the billing term for your hosting account: monthly, annually, or every three years. Grab the discount deal on DreamHost hosting.
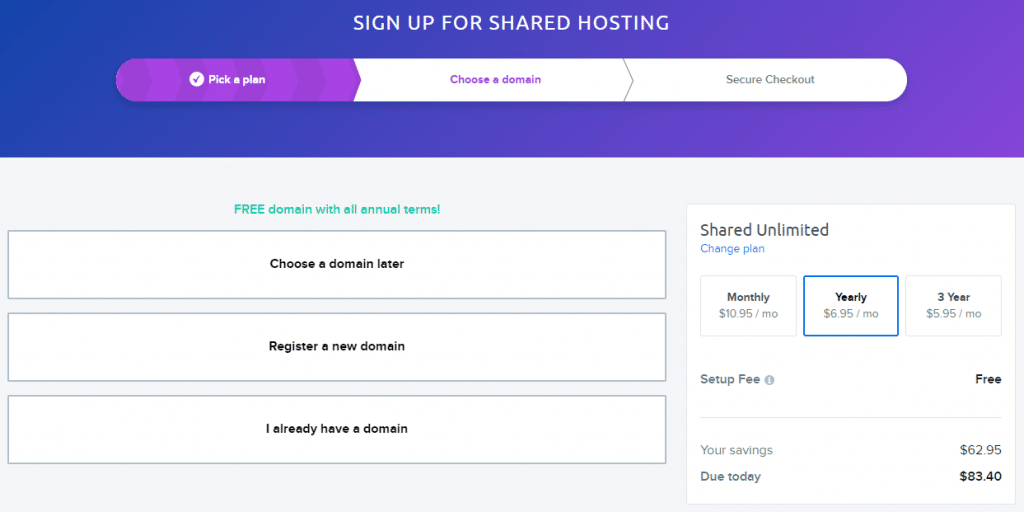
Select the package.
Step 5: Once you choose your hosting provider, you need to select your domain:
A form will appear where you’ll be able to register a free domain (included with all annual terms) or enter a domain that you already own.
A domain name is your website name. A domain name is an address where Internet users can access your website. A domain name is used for finding and identifying computers on the Internet.
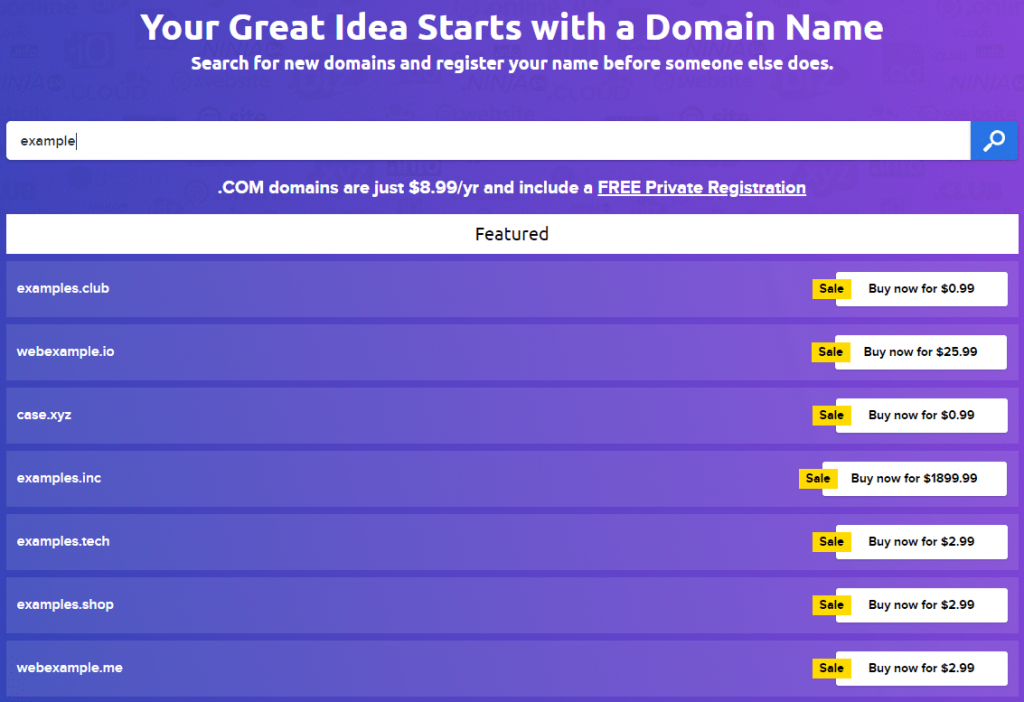
To register the Domain Name:
Visit dreamhost.com and open domain section you will see the domain registration portal.
Enter the domain name you want to register into the search bar — press Enter.
A list of Featured, Popular, and Suggested domain names will appear. Look through the list and select the domain name you’d like to register.
Choose the domain you want.
Now, it will ask for your email and password to create your account with DreamHost. Enter the necessary credentials and click Continue.
After that, complete the registration and process the payment. Keep in mind; domain registration is completely free for the first year when you sign up for a shared hosting plan.
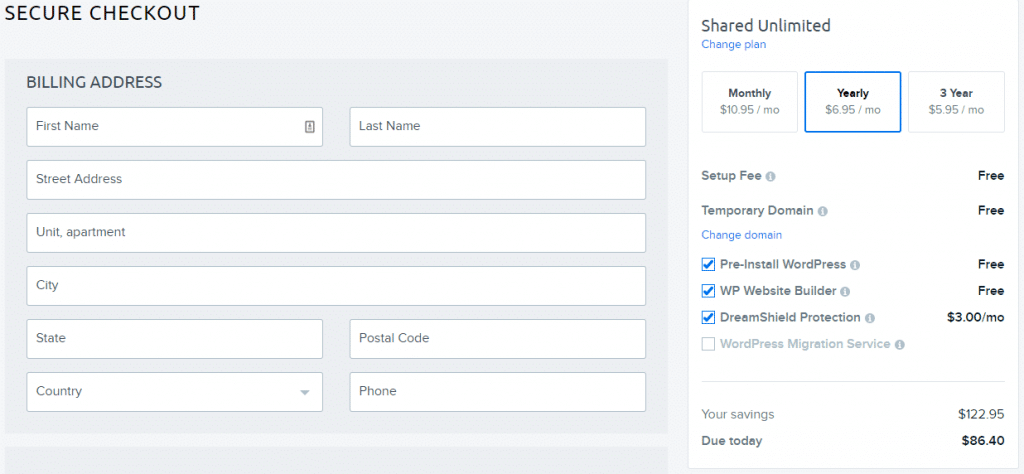
Step 6: Complete Billing:
Add your billing information and review all the details about your hosting package.
Make sure that the box next to “Pre-Install WordPress” is checked.
Step 7: Select Payment Gateway:
Once you made your account selections, determine your payment method.
You can pay via Credit cards and PayPal.
Once you successfully inserted Payment information, click on the ‘Submit Order‘ button.
The installation of your website’s database will complete within a couple of minutes. You will receive a verification email with additional instructions on configuring your new WordPress software, including a link to create your WordPress password.
Step 8: Installing WordPress:
To run a site or blog with WordPress, WordPress should be installed on your site before you can use it.
As you have already enabled ‘Pre-Install WordPress‘ in Step 6, you don’t need to install it either way.
But, in case if you want to install,
There are two ways to install WordPress:
1. Manual installation
2. One-click installation
Manual installation requires you to install software on your site. The whole process is infamously quick. If you’re tech-savvy personality, then only this option is recommended.
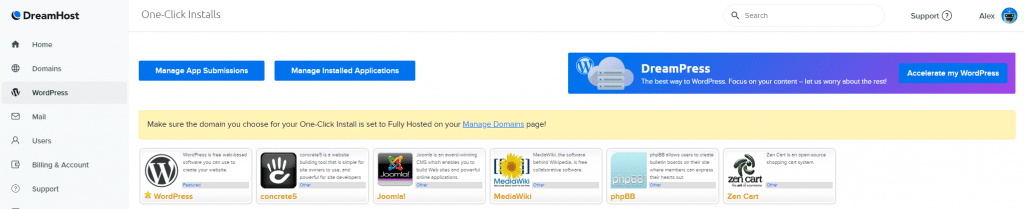
On the other hand, the one-click installation tool is a considerably simplified process.
To install WordPress at DreamHost, log into your panel, and Navigate to WordPress >> One-Click Installs.
Now, select the domain you want to install WordPress on. You can pick an existing database to use for your new site. However, in most cases, you can just leave this set to Automatically Create Database.
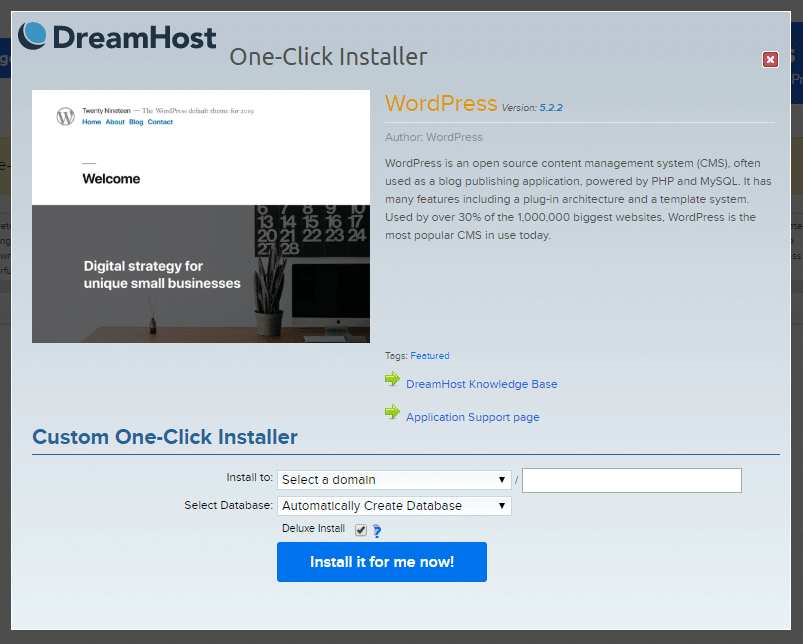
Here, you can see the ‘Deluxe Install‘ is already enabled. Keep it enable and Click on Install it for me now!
The free Deluxe Install features several important customizations to make it easy for beginners to get started, including free and open source themes from Automattic, a standard selection of plugins, and security enhancement.
Within several minutes, your installation process will be done.
Once the installation is complete, you will receive a verification mail with a link and log in information for your new WordPress site.
Step 9: Choose a Theme:
A theme controls the general appearance and feel of your site, including things like page layout, widget locations, and default font and color choices. WordPress.com has a range of themes for you to choose from in the Theme Showcase, where each theme has an about page that includes features and instructions. New themes are always being added, keep checking for new designs: you can change your theme as often as you like.
Which theme to use? Here is a list of the top 6 WordPress themes.
Step 10: Install the Theme:
- To get started, visit your site and navigate to Appearance >> Themes.
- Click the Add New Button.
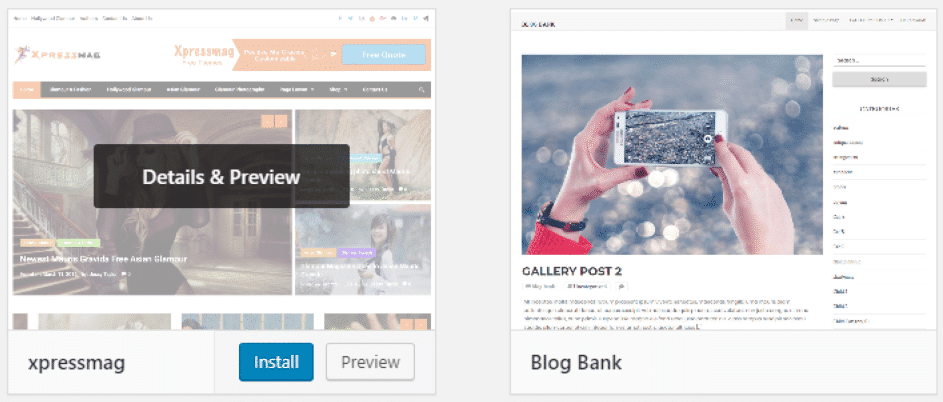
You’ll be presented with a searchable version of the Theme Directory.
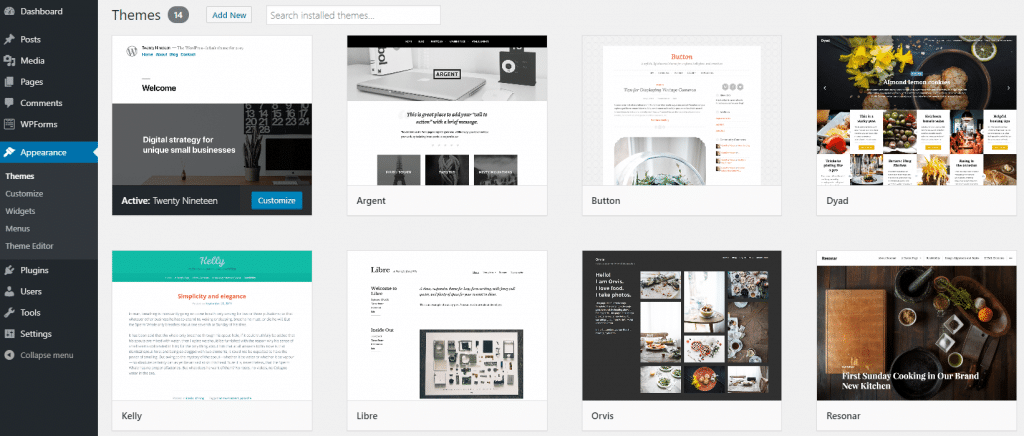
- Once you know which theme you want, hover over its image and click on the Install button.
It will take just a few seconds to install the theme.
- Once installed, you can see a live preview of the Theme. Now, Click Activate.
Your site will immediately switch on the new theme. That’s it.
Manual Installation for themes:
In case you have bought a premium theme from another directory or a developer’s website, you won’t be able to install it using the above method.
To do it manually,
- Download the zip file of the theme.
- Once you have the theme’s zip file saved to your computer, go to your WordPress dashboard.
- Visit Appearance >> Themes and click on Add New. This time, however, you’ll want to click on the Upload Theme button.
- Next, click on Choose File. Then navigate to and select the theme’s file on your computer, and click on Install Now.
Step 11: Customize the plugins:
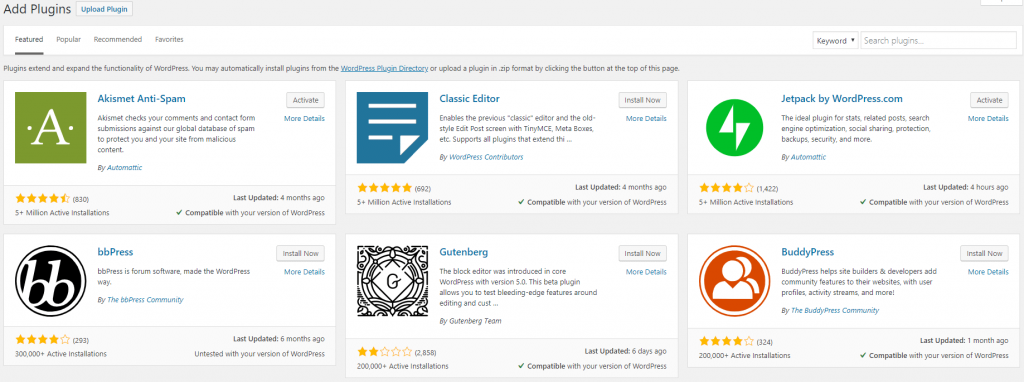
There are 45,656 plugins available in the WordPress plugin repository. In my previous guide, I have listed some essential plugins which will surely add more features and new functionality to your WordPress blog.
Step 12: Its time for contents:
Posts are what make your blog. It is nothing but the entries listed in reverse chronological order on the blog home page. Due to their reverse chronological order, your posts are meant to be timely. They are written on a regular schedule, and one of their essential purposes is to keep your site fresh with new content.
In my previous guide, you will learn how to write your first blog.
Step 13: Share your Posts:
Gaining readers’ attraction and their encouragement is essential to get real visits from the targeted audience. Thus, it is necessary to share posts.
Social media is the best option to share your posts. They are channels where users can easily be influenced.
Here are some factors to consider that will give you social traffic.
Final Words:
Your blog or site is completely ready now.
I hope this guide helps you create a new blog or site hassle-free without requiring any technical knowledge.
If you have any queries, ask me in the comment section below.